If your Xbox controller bumper not working the way it should whether it’s not clicking, sticking during gameplay, or failing to register any input at all you’re not alone. Many Xbox users across Xbox One, Xbox Series X, and Xbox Elite Controller models experience bumper-related issues, especially with the RB (Right Bumper) and LB (Left Bumper) buttons.
In this complete guide, you’ll learn exactly how to identify the problem, troubleshoot it using both software and hardware solutions, and repair or remap your bumper if needed. We’ll also show you how to prevent bumper wear in the future, so your controller stays game-ready for longer.
Whether your issue stems from controller input failure, a faulty button click, or mapping conflicts in the Xbox settings, this guide is designed with your user intent in mind from casual gamers to DIY repair enthusiasts.
Why Your Xbox Controller Bumper Isn’t Working
If your Xbox controller bumper is not working, the first step is understanding what exactly is going wrong. Here’s what to look for and why it might be happening.
Common Signs of Bumper Failure
- No tactile feedback when pressing the bumper
- Button presses feel soft or sunken.
- Game actions don’t respond even after pressing the bumper.
- The bumper feels physically stuck or unresponsive.
- Noticeable input delay or inconsistency while gaming
These are often the early indicators of controller input issues and can occur suddenly or build up over time.
Primary Causes Behind Bumper Malfunctions
- Physical Wear and Tear
- The bumpers, especially RB and LB, endure repeated presses. Over time, the internal spring mechanism or microswitch beneath the controller bumper can wear out, resulting in a faulty bumper.
- Broken or Misaligned Parts
- A broken bumper may have become disconnected from its actuator or housing, especially if the controller was dropped. In some cases, the shell may apply uneven pressure to the button, causing misclicks or non-responsiveness.
- Spring or Switch Damage
- The internal bumper spring can slip out of place, lose tension, or even snap. This leads to that familiar “press with no click” feeling, commonly searched as “bumper not clicking.”
- Software or Mapping Conflicts
- It’s possible that the issue isn’t hardware-related. An incorrectly configured controller via the Xbox Accessories App or a game’s settings may cause the in-game button to appear non-functional. These are often mistaken for physical issues when they’re actually a result of bad input mapping.
Affected Buttons and Controller Models
The most commonly affected buttons are:
- RB Button (Right Bumper)
- LB Button (Left Bumper)
These issues have been reported across:
- Xbox One
- Xbox Elite Controller
- Xbox Series X Controller
These models share similar bumper designs, which makes troubleshooting and repairs mostly uniform across them.
Quick Checks Before You Open Your Controller
Before you reach for a screwdriver or consider opening your controller, there are a few important diagnostics and software-based solutions you should try first. Many users experiencing issues with the Xbox controller bumper discover that the problem isn’t with the hardware at all. Below are simple, effective steps to help you confirm whether it’s truly a mechanical fault or something fixable in minutes.
Verify Input with a Gamepad Tester
To begin troubleshooting, use a reliable Gamepad Tester tool. These free browser-based tools show real-time input response when buttons are pressed, including the RB and LB buttons. If the controller button registers on-screen when pressed, the issue may not be mechanical—it could be a mapping conflict or game-specific problem.
You can test your Xbox controller online using sites like gamepad-tester.com. If no input is detected despite pressing the bumper, proceed to the next steps.
Check for Firmware Updates via Xbox Accessories App
Sometimes, an outdated firmware can affect input recognition and create bumper lag or intermittent behavior. Connect your controller to your PC or console and launch the Xbox Accessories App. The app will notify you if a firmware update is required. Keeping your firmware updated ensures compatibility and performance stability across games and platforms.
Try Remapping the Bumper Function Temporarily
If the bumper physically clicks but still doesn’t respond in-game, try remapping it to another button as a temporary fix. Within the Xbox Accessories App, you can assign the LB or RB function to a different input, such as a trigger or face button. This can help identify whether the issue is mapping-related or hardware-specific.
Using Xbox controller mapping as a diagnostic step can also be helpful if you’re unsure whether it’s a game-specific setting interfering with bumper input.
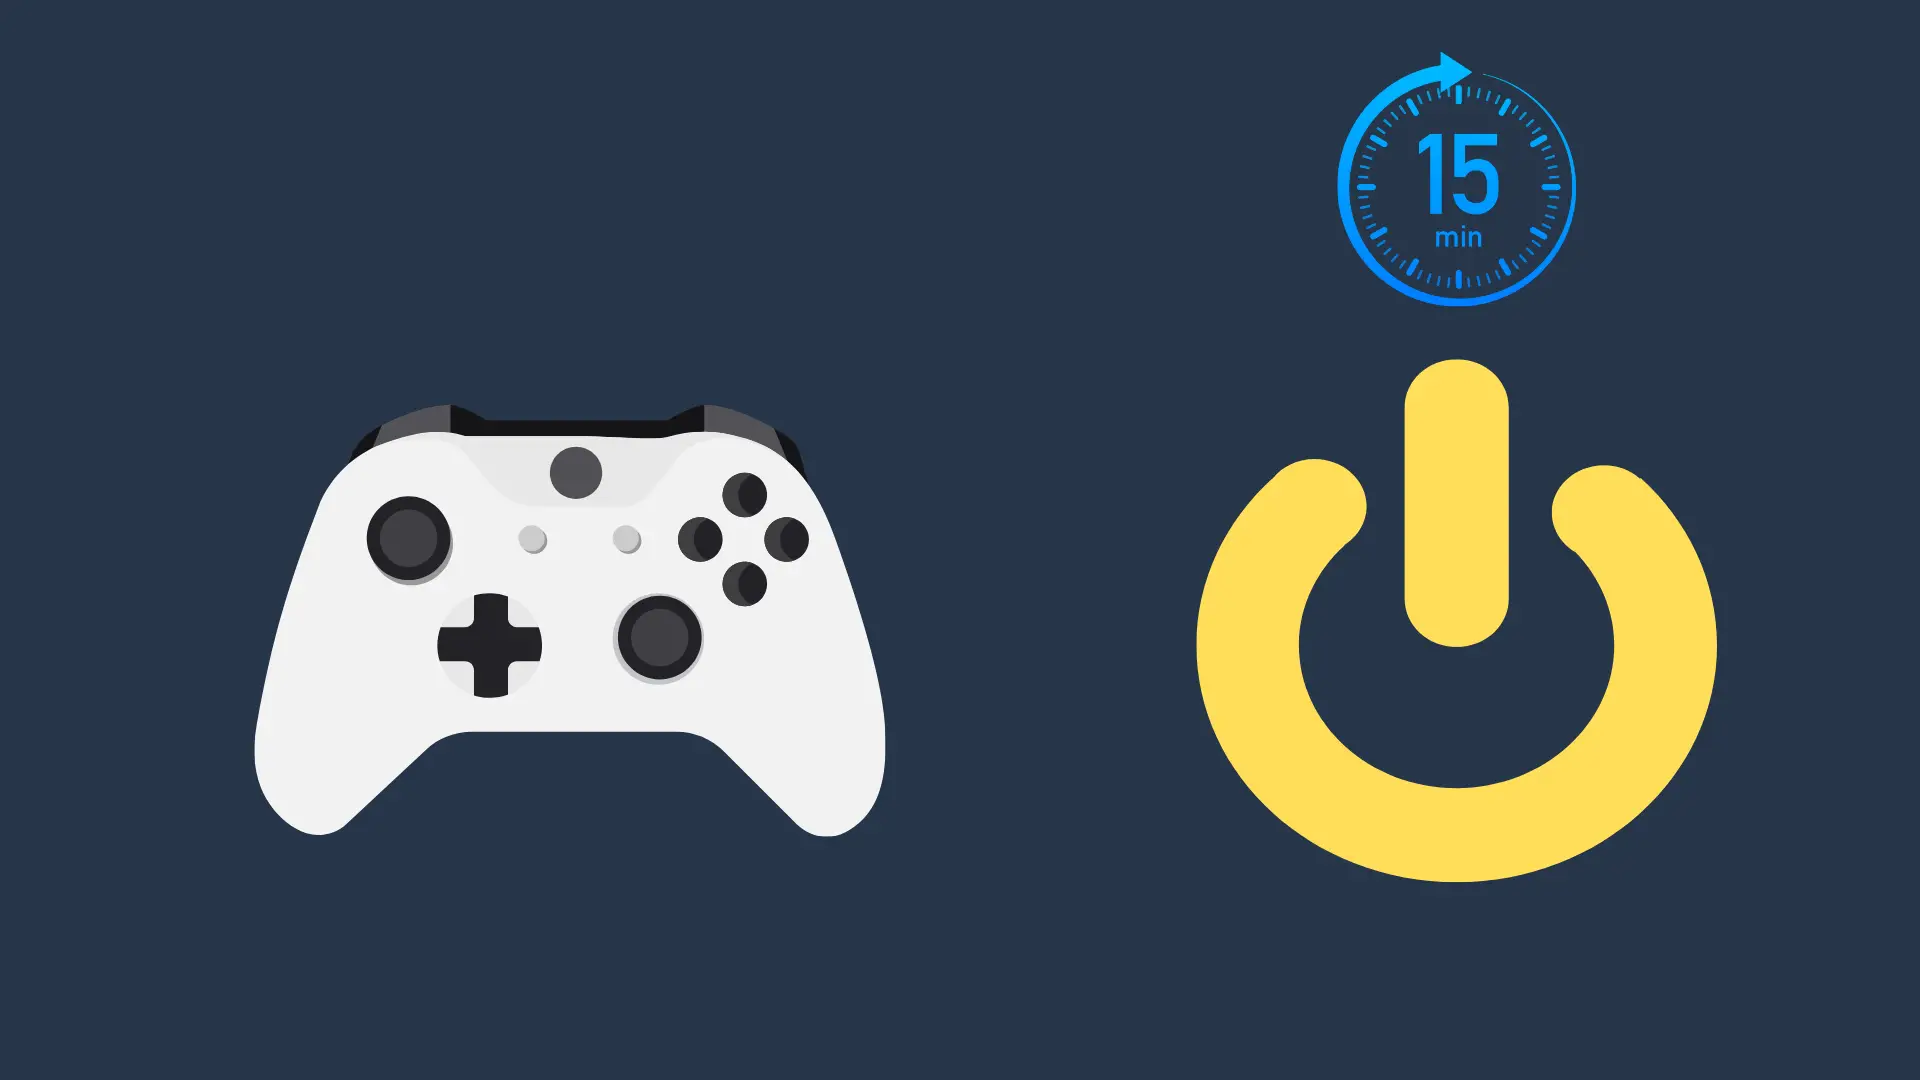
Perform a Hard Restart or Controller Reset
In many cases, users overlook simple resets. A hard restart of your Xbox console or PC can reset controller input behavior. If you’re using a PC with Windows 10/11, unplug the controller and plug it back in after restarting the machine. For Xbox consoles, hold the power button until it shuts down, then restart.
This process helps resolve software glitches that may be misinterpreted as controller calibration issues or broken bumpers.
Clean the Bumper Area to Remove Debris or Stickiness
If your bumper is physically pressing down but feels resistant, it could be a sticky bumper caused by accumulated dust or spilled residue. Use a microfiber cloth or soft-bristled brush to gently clean around the bumper edges. In some cases, compressed air can help loosen trapped particles. Avoid using liquid cleaners unless disassembly is planned, as moisture can damage internal components.
Step-by-Step Guide – How to Fix the Xbox Controller Bumper
If you’ve completed the basic troubleshooting steps and your Xbox controller bumper is still not working, it’s time to consider a manual fix. This guide walks you through how to disassemble the controller, assess the damage, and either adjust or replace the bumper mechanism using basic tools.
This process applies to most Xbox models, including the Xbox Wireless Controller, Xbox Series X controller, Xbox One, and even the Xbox Elite Controller, due to similar internal layouts.
⚠️ Proceed with care. Disassembling your controller may void any active warranty.
Tools You’ll Need
Before starting, gather the following:
- Torx T8 screwdriver (security bit recommended)
- Pry tool or plastic opening tool.
- Spudger
- Tweezers (optional for handling springs)
- Bumper replacement kit (if the part is damaged beyond adjustment)
- USB cable to reconnect and test (preferably via USB-C port if supported)
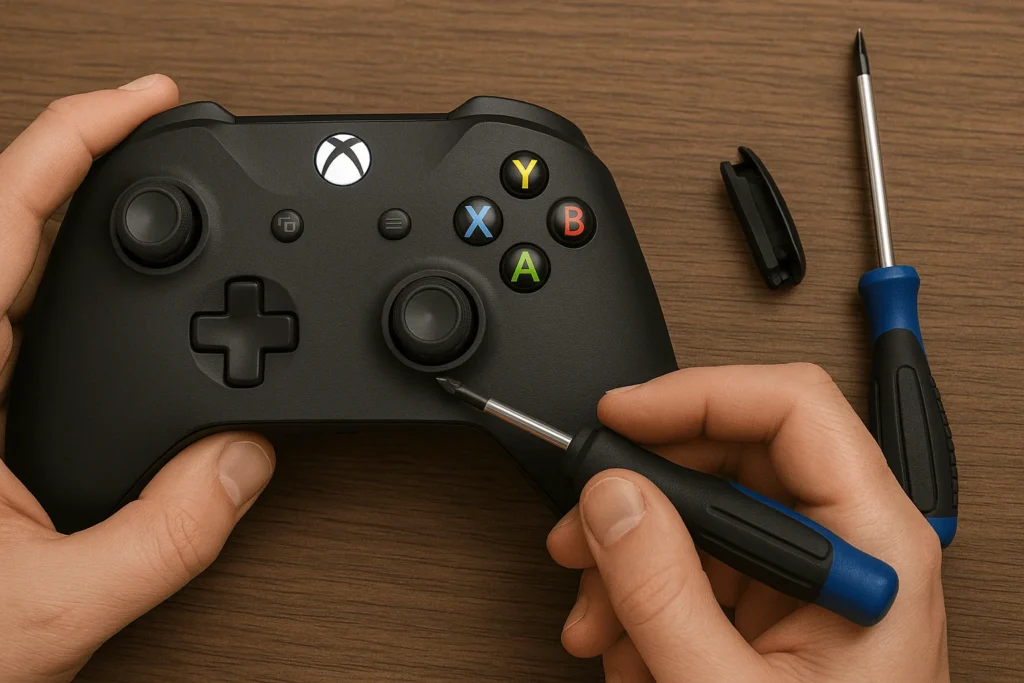
Step 1: Safely Disassemble the Controller
Begin by removing any battery packs or backplate covers. Using the Torx T8 screwdriver, unscrew the backplate screws typically one behind the label under the battery and two on each handle.
Use a pry tool or spudger along the seams of the handle to gently detach the controller’s shell. Be careful not to force the casing apart as you risk physical button damage or severing internal cables.
This step is critical and sets the foundation for safe repair. Take photos along the way if this is your first Xbox controller disassembly.
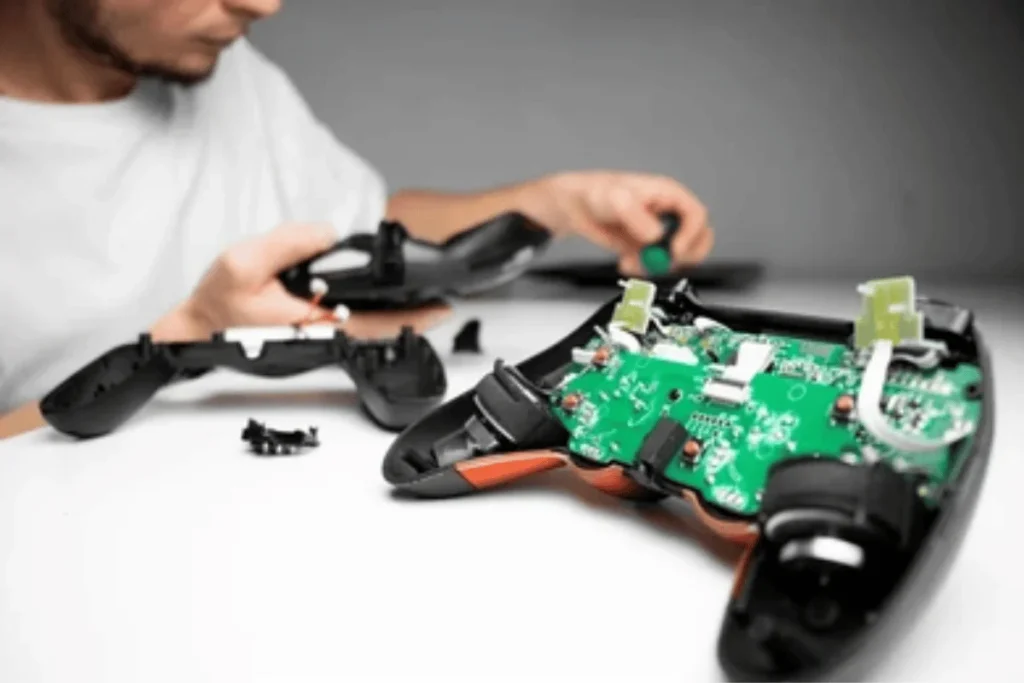
Step 2: Locate the Bumper Mechanism
Once the shell is open, identify the RB and LB bumper bar. These are typically one connected piece that presses down onto small tactile switches soldered on the mainboard. Examine:
- The spring alignment
- Tension of the plastic bumper bar
- Any signs of hardware malfunction or part fractures
In some cases, the trigger buttons may need to be slightly loosened to give better access to the bumpers.
Step 3: Adjust or Replace the Bumper Mechanism
If the bumper is misaligned, gently reseat it with a spudger or tweezers. Realign the spring so it provides upward tension again.
If the bumper or switch is cracked or nonfunctional, use a bumper replacement kit. These are available online for most controller models and include the plastic bar, spring, and sometimes the tactile switch.
You may also inspect the PCB contact area if the tactile switch has failed, desoldering and replacing it may be needed (advanced users only).
This step is the core of how you replace Xbox controller bumper components yourself.
Step 4: Reassemble and Test
After correcting or replacing the bumper, reassemble the controller by reversing the disassembly steps. Make sure all parts sit flush, and screws are tightened evenly.
Reconnect your controller via the USB-C port or wirelessly, and test the RB/LB inputs in a game or using a Gamepad Tester.
If the bumper click feels responsive and registers during gameplay, your fix was successful.
Alternative Fix – Remap the Bumper to a Different Button
If your Xbox controller bumper is not working and you’re either waiting for a replacement part or want to avoid disassembling the controller, remapping the bumper to another button can be a practical workaround. This temporary fix is especially helpful if the bumper click still feels tactile but doesn’t register properly in gameplay, or if you’re facing controller input issues caused by internal wear.
Thanks to the Xbox Accessories App, this process is straightforward and doesn’t require any technical expertise.
How to Remap the Bumper Using the Xbox Accessories App
- Connect your Xbox Wireless Controller to your Xbox console or Windows PC.
- Open the Xbox Accessories App (available on both platforms).
- Select your connected controller from the main dashboard.
- Choose the “Configure” option, then create a new profile or edit an existing one.
- Under the “Button Mapping” menu, assign the RB or LB function to an unused controller button, such as a trigger or D-pad direction.
- Save the profile and make it active.
This remap allows you to retain full gameplay functionality even if your original bumper issue hasn’t been physically resolved.
When Is Remapping a Good Option?
This method is ideal for:
- Players who don’t want to open their controller and risk damaging the internals.
- Users with an Xbox Elite Controller, where multiple input profiles can be quickly toggled.
- Situations where the bumper is physically broken, but another unused button is available.
Limitations of the Remap Method
While effective in many cases, bumper remapping has its trade-offs:
- Muscle memory challenges: It can take time to adjust to a new button replacing your usual RB or LB.
- Game restrictions: Some games don’t support remapped input profiles, or they might override them with in-game configurations.
- Multi-input actions: If the new button is already mapped to another action, this may create control conflicts.
Even with these limitations, remapping remains a valuable tool when dealing with temporary or minor controller button issues.
Can Firmware or Software Updates Solve Bumper Issues?
If your Xbox controller bumper is not working, you might be wondering whether a quick firmware update or software reset could be the solution. In many cases, especially when the bumper is not clicking properly or fails to register in games, the issue may be more than skin-deep. However, before jumping into hardware fixes, it’s worth exploring the software side.
Here’s how to determine whether your bumper issue is a result of a configuration glitch, outdated software, or a deeper mechanical failure.
How to Check and Update Your Controller’s Firmware
Microsoft regularly releases firmware updates for the Xbox Wireless Controller, improving connectivity, compatibility, and button responsiveness. To check for updates:
- Connect your controller to an Xbox console or a Windows 10/11 PC.
- Open the Xbox Accessories App.
- Select your controller > Choose “Update” if an update is available.
- Follow the on-screen instructions to install the firmware update.
Outdated firmware can occasionally lead to controller input issues, including delays, dropped inputs, or inconsistent button clicks.
When Firmware Updates Won’t Help
If your RB or LB button feels physically off or there’s no feedback when pressing it, software changes won’t resolve the issue. In this case, it’s likely a hardware malfunction. Signs that firmware won’t fix your problem include:
- Pressing the bumper results in no tactile feedback
- The button physically feels loose or detached.
- The game does not recognize the controller input even after updates and resets.
These are indications that the internal bumper mechanism may be damaged and require manual repair or replacement.
Resetting the Controller Software (Profile or System Level)
Sometimes, controller issues stem from profile conflicts or corrupted configuration files. To reset:
- On Xbox: Navigate to Settings > Devices & connections > Accessories and select “Restore to default.”
- On PC: Reconfigure or remove your controller profile via the Xbox Accessories App.
- Alternatively, you can perform a full system power cycle by holding the power button on your console until it turns off, then restarting.
This can clear up settings conflicts, causing your controller button to behave erratically.
When to Contact Xbox Support
If your controller is under warranty or you’re unsure whether the issue is mechanical or software-related, it’s wise to contact Xbox Support. Through the Microsoft warranty portal, you can check coverage status and request service or a replacement.
This is especially helpful if your controller is relatively new or if you’ve already exhausted all DIY solutions.
Compatibility Warning – Using Xbox Controllers on Other Devices Like PS4

If you’ve searched for “Xbox controller bumper not working PS4”, you’re likely trying to use an Xbox Wireless Controller on a PlayStation 4 console. While it may seem like a simple cross-platform setup, compatibility between these two systems is not officially supported, and that’s often the root of the problem.
Many users experience controller input issues, including button lag, unresponsive bumpers, or incorrectly mapped inputs when attempting to pair Xbox controllers with a PS4, even through adapters.
Why Xbox Controllers Aren’t Natively Compatible with PS4
The Xbox Wireless Controller is built around Microsoft’s proprietary input protocol, while Sony uses a different system for its PS4 hardware. Because of this difference, connecting the controller directly via Bluetooth or USB typically results in partial or inconsistent functionality.
You may notice that some buttons work while others, such as the RB or LB bumpers, don’t register at all. This often leads users to believe the Xbox controller bumper is not working, when in reality, it’s a case of analog input failure due to system incompatibility.
Known Issues When Using Xbox Controllers on PS4
- Remapping Problems: Button layouts do not match, which can cause confusion during gameplay.
- Bumper Delay or No Response: The RB and LB buttons may suffer from button lag, making them useless in high-speed or competitive games.
- Partial Input Recognition: Not all inputs are translated properly, especially if you’re using a third-party dongle or software emulator.
- No firmware support: The PS4 cannot push firmware updates to Xbox devices, which may affect performance further.
These issues create a less-than-optimal experience, particularly if you’re used to quick, responsive bumper feedback on an Xbox system.
Workarounds: Use with Caution
There are third-party adapters and software that claim to bridge compatibility between Xbox controllers and PS4 systems. Some popular options include USB dongles and input mappers, which emulate controller behavior.
However, these solutions often come with trade-offs:
- Increased input latency
- Unstable connection behavior
- No support for firmware updates
- Limited button remapping functionality
For casual or experimental use, they might serve the purpose. But if you’re playing competitively or in fast-paced titles, using an Xbox controller on a PS4 is not recommended.
When to Repair, Replace, or Retire Your Controller

If your Xbox controller bumper is not working, the natural next question is whether you should repair it, buy a new controller, or retire it altogether. The answer often depends on the extent of damage, cost of repair, and whether you’re covered under a Microsoft Warranty.
Compare: Bumper Replacement Kits vs Buying a New Controller
Most bumper repair kits are relatively affordable, typically ranging from ₹500 to ₹1,500 depending on the model and whether you’re replacing the entire bar, spring, or tactile switch. If the rest of your controller functions well, this option is both cost-effective and practical.
However, if you’re using an older model and the issue isn’t just a faulty bumper for example, if the controller shell is cracked or multiple buttons are failing it may make more sense to upgrade.
New Xbox Wireless Controllers retail between ₹4,000 and ₹6,000, while Xbox Elite Controllers are priced significantly higher but come with premium components and customizable parts.
Is Your Controller Still Under Warranty?
Before you do anything, check your Microsoft Warranty status. Microsoft provides a limited warranty on controllers, and in many cases, bumper issues that arise from manufacturing defects can be fixed or replaced at no extra cost.
To check your eligibility, visit the Microsoft Warranty Portal and enter your controller’s serial number.
If your warranty is active, you can avoid the DIY hassle and send your controller in for service or replacement.
When a Repair Isn’t Worth It
If you’ve already tried the steps in a controller repair tutorial and the issue persists, or if internal components are damaged beyond easy replacement, it may be time to let go.
Also, if you’re facing multiple problems like drift, input delay, and unresponsive buttons beyond just the bumper, continuing repairs may not be cost-effective.
In such cases, replacing the unit is often the better investment in terms of both time and long-term performance.
How to Prevent Future Bumper Problems
Once you’ve repaired or replaced your Xbox controller, it’s worth taking steps to extend its lifespan. Proper care and usage habits can prevent issues like sticky bumpers, button lag, or shell damage from recurring.
Keep Bumpers Clean and Debris-Free
Dust, skin oils, and residue from snacks can easily build up around your trigger buttons and bumpers, especially with extended gaming sessions. Use a microfiber cloth or soft brush to clean around the controller shell regularly.
Avoid inserting sharp tools to clean the bumper area, as that can damage the underlying components.
Avoid Over-Pressing or Aggressive Inputs
Excessive pressure on the RB and LB buttons contributes to bumper wear over time. These inputs are designed to register with minimal force, so gentle but firm pressing can reduce mechanical stress on the internal mechanism.
Use a Protective Controller Case
If you frequently carry your controller around or travel with it, invest in a case. A softshell or hardshell case absorbs shocks and prevents damage to vulnerable components, especially the bumpers and controller shell.
Safer Storage & Update Regularly
Store your controller in a clean, dry area away from sunlight and humidity. Firmware updates pushed by Microsoft often include performance fixes, which can improve button response time and prevent minor input-related glitches.
Regular updates can optimize how your bumpers interact with software, reducing perceived lag or miscommunication.
Final Thoughts
Dealing with an Xbox controller bumper not working can be incredibly frustrating, especially when it disrupts key gameplay actions. Whether it’s a slight delay, a sticky response, or a complete failure, the good news is that you have several reliable fixes to get your controller back in action without much hassle.
Start by troubleshooting the issue using software tools and basic cleaning. If that doesn’t resolve the problem, consider your next steps: repair the bumper with a kit, remap the function using the Xbox Accessories App, or, if needed, replace the controller entirely.
Don’t rush to disassemble until you’ve tried the simpler fixes. In many cases, the solution is more straightforward than it seems.
If you’re still unsure, explore YouTube tutorials, gaming forums, or step-by-step guides from the Xbox community. The wealth of shared experience can help you diagnose or solve more complex problems.
Drop your controller model and issue in the comments if you’re still stuck. Let’s fix this together.
FAQs – Fixing Xbox Controller Bumper Issues
How can I clean the bumper without damaging the controller?
Use a microfiber cloth or soft brush to clean around the controller bumper gently. Avoid using liquids or sharp tools that can cause internal damage. Compressed air can help dislodge dust or debris around sticky RB or LB buttons.
Are there any specific tools needed to fix the bumper?
Yes, for safe disassembly, you’ll need a Torx T8 screwdriver, a plastic pry tool, and optionally a spudger and tweezers. These tools help you open the controller shell without causing damage.
What are the signs that the bumper needs replacing?
If you feel no tactile feedback, notice inconsistent in-game response, or the bumper is physically loose, these are signs of a faulty bumper. These issues are usually not fixable through software.
Can firmware updates fix issues with the bumper?
Firmware updates can resolve calibration issues, button lag, or software-level conflicts. However, they won’t fix physical damage. Use the Xbox Accessories App to update your controller.
How do I remap the bumper to a different button?
Open the Xbox Accessories App, choose your controller, and use the “Configure” option. Assign the RB or LB function to another input, like a trigger button. This is a useful temporary fix for unresponsive bumpers.
How do you fix an unresponsive bumper on an Xbox controller?
First, test the bumper with a Gamepad Tester to confirm whether it’s an input or hardware issue. Try a firmware update or remapping the button. If it still doesn’t respond, the controller bumper likely needs replacement.
How do I fix my Xbox controller not working?
Start by checking the connection (USB or Bluetooth), updating the firmware, and resetting the controller. If buttons like RB/LB don’t respond and you’ve ruled out software issues, disassembly may be required.
How do you take the bumper off the Xbox One controller?
After disassembling the controller using proper tools, gently detach the bumper bar by lifting it off the internal switches. Be careful not to damage nearby parts like the trigger buttons.
How do you fix a stuck button on an Xbox controller?
A sticky button may result from dust, residue, or wear. Clean around the button edges with a dry brush or compressed air. If the issue persists, disassembly may be required to clean the interior.
How to hard restart Xbox One?
Hold the power button on the console for 10 seconds until it shuts down. Wait a few seconds, then power it back on. This helps reset minor controller calibration issues and software glitches.
Also Read: