Up until a few years ago, it was unheard of to be able to control the temperature of their house or apartment remotely but today, people are using products, such as the Nest Thermostat, to do just that. This type of thermostat also assists people who are impaired visually or who are completely blind to be able to adjust the temperature of their home. The issue is, though, that you need to first connect your phone to the thermostat to be able to utilize this amazing technology. Read on to learn about all the steps you need to take to properly connect the Nest Thermostat to your phone.
All you need to connect your Nest Thermostat to your phone is a Wi-Fi connection within your home. The Nest Thermostat app is easy to install and to continue to maintain once you install it and will remember your settings for both heating and cooling your home.
The Nest Thermostat allows you to even be more friendly to the environment while cutting costs on your heating and cooling bills. Now let’s take a look at this process step by step.
Install it First
Before installing the Google-owned Nest Learning Thermostat in your home that you can purchase on the Nest website, the Apple Store, or from places like Lowe’s Home Improvement, be sure to take an online survey on the website for Nest to ensure it is compatible with your home. This will entail you to remove your thermostat to be able to view some of the wiring inside.
There are instructions within the survey page that will instruct you on how to complete this task as well as a video. Nest also includes a manual with it when you purchase the product. Keep in mind that you can always have a contractor or someone else do this step for you.
Steps to Set Up and Connect Nest to Your Device
The Nest Thermostat Is considered a self-learning appliance that is controlled through an app. You can download the app from the App Store on your particular device, including your IOS devices, such as an iPhone or iPad, and you can also add it to any Android device. Due to the type of marketing that has been done, many people think the Nest Thermostat is only for Apple devices, but that is simply not true since you can download it to your Android phone or another device. Read on for instructions on how to download then connect your Nest Thermostat to your device.
How to Set Up the Remote Access
To set up the Nest Thermostat, be sure that your thermostat is within range of a Wi-Fi connection. You need to enter your Wi-Fi connection and the password for it to allow the thermostat to pair with your phone or other devices. You will need to set up a user account on the Nest website with all of your information. There are also instructions for this part of the procedure on the Nest website, but it may be a little difficult to read since the font is smaller, but there are also videos available. On the upside, this initial setup process only has to be done one time.
What It Looks Like
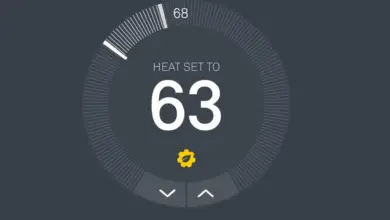
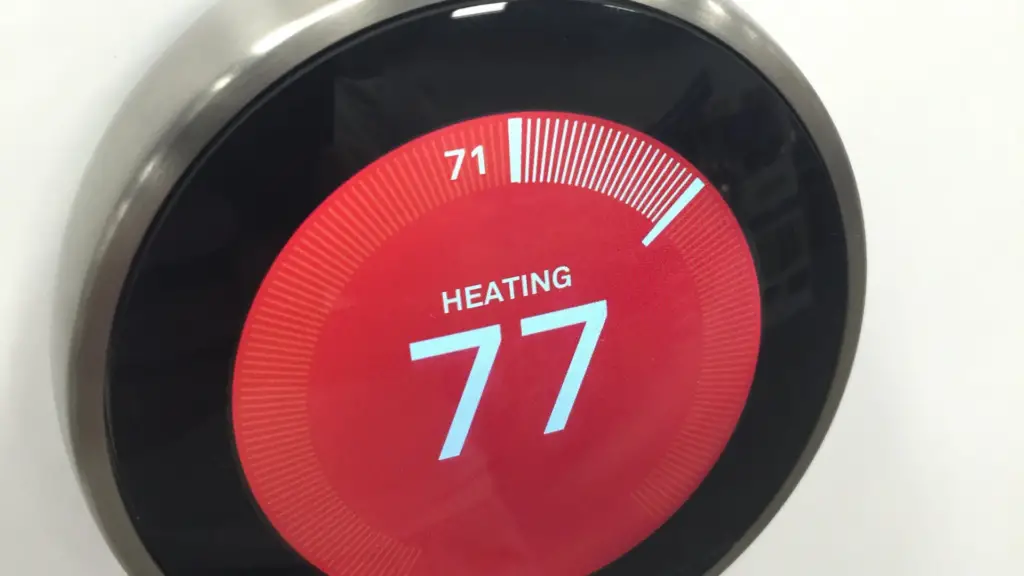
The Nest Thermostat comes in a circular shape and only measures about 3 1/2 inches across. The outer ring of the thermostat can be turned clockwise if you want to increase the temperature or counterclockwise if you want to decrease the temperature in your home. The temperature is displayed boldly and can be read easily. The background behind the white numbers for the temperature will turn a dark orange color when your furnace is heating the home or dark blue when it is in cooling mode. If it is at rest, the background will just be black. When you press the ring, it will give you several additional options, such as heat and cool mode, energy, settings, schedule, away, and done.
Download the App
You can download the Nest app from the App Store by using your email address and the password that you’ve already used for your Nest account. keep in mind that although your thermostat relies heavily on Wi-Fi to be accessed if you are away from your home, you will still be able to control your thermostat by using your phone whether you have a Wi-Fi connection or you are simply using your data plan connection.
Sure you have downloaded the app, you will need to follow the instructions to sign in to it. Once you are in the app, you will set up your city and state as well as other details for your personal account. You can also read legal documents addressing privacy issues as well as options for updating the product, your Nest usage, and any alerts if any issues ever occur.
You can then click the home button that is displayed, which will give you the current temperature of your home and will allow you to change things like the font size of the display, and the level of brightness or contrast that you want to achieve. You can change any of this through the app anytime you want to in the future.
While you are in your app, you can select the status you want your thermostat to be set on, such as cooling, heating, or away along with the exact temperature that you want the thermostat to be set on. There are also buttons that you can press to increase the thermostat’s temperature or decrease it. VoiceOver is available in the app, although for some features, it may be a little more difficult to use, such as using the diamond buttons to increase or decrease the temperature. There will also be a green leaf that appears that you can select on your phone to set your Nest thermostat to an energy-saving feature.
You have now connected your phone to your Nest thermostat, and it can now be used from wherever you are. Whether you are on vacation and thousands of miles away or you are at home and want to change the temperature but do not want to get up and physically walk to the thermostat, you can control the temperature of your home. Obviously, a very convenient little device to have in your home.