

There’s nothing worse than placing your earbuds in your ears and noticing that one earbud just isn’t working.
We’ve covered this topic numerous times, and for numerous brands, one thing we can tell you with certainty is that this is a universal issue among wireless earbuds and is a lot more common than you’d think.
There are several reasons why this may occur, as we’ll mention below. However, one main issue we would like to note about true wireless earbuds is the way it saves data and stores information. Once you pair your earbuds to your device, both your earbuds and device save it’s pairing history in order to be able to connect automatically; however, this also tends to cause several pairing issues along the way and is generally the primary cause of one earbud not working.
However, this is just one reason why this issue may occur. There are, in fact, four primary reasons you would need to be aware of. We’ll break the whole thing down in this article and show you how you can quickly diagnose and solve the issue. Let’s get started!
Why One Of Your Earbuds Aren’t Working
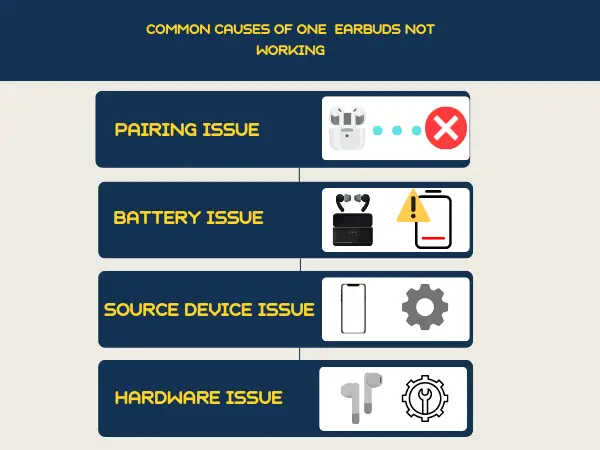
There are four primary reasons why one earbud may not be working. The first and most common reason is usually due to a pairing/connection issue, the second is a battery issue, and the third is a settings issue; primarily, the settings on the Source device (The device that you’re connecting to) would need to be adjusted or reset. And the fourth is a hardware issue; this can be from damage or obstruction.
We’ll walk you through every single fix as well as how to diagnose the issue.
If The Problem Is Due to a Pairing/Connection Issue or a Battery Issue:
Typically the most common cause of one earbud not working usually boils down to a pairing issue. This can either be the earbuds not pairing with one another or one earbud not being able to successfully pair to your device. There can be a few reasons for this issue. We’ll break down every single possible reason this can occur and how to fix it.
1. Earbuds aren’t correctly placed on the charging connectors
The first thing you’ll want to check is if the earbud’s charging connectors are actually correctly placed on the case’s charging pins.
While the pairing process differs depending on the brand and model of the earbud you own, universally, earbuds are required to be in the charging case to trigger the pairing process & establish a connection to an external device or to one another. Thus if even one of your earbuds is not correctly placed on the case’s charging pins, the pairing process will fail.
How to know if this is the cause of your issue?
To know if your earbuds are correctly positioned for the connection, you’ll need to check both earbuds’ charging status. Depending on the earbuds you own, the process varies. Some would display the charging status on your phone, while others would have a flashing LED indicating that your earbuds are charging, and others would require you to install an app in order to monitor your earbud’s current charging status.
If you’ve confirmed that both earbuds are charging when in the case, then move on to the next step. If you’ve determined that one earbud is not charging, then follow the steps below while monitoring the charging status of the earbud that isn’t charging.
Here are a few instances in which this may occur:
1. Earbuds not positioned correctly in the case:
The first and obvious reason this may occur is simply due to the fact that the earbuds are incorrectly positioned in the charging case. In some cases, you will need to continuously reposition the earbuds to get this working. In other cases, you may need to gently press down on the earbuds to get them to form a connection with the charging pins.
2. Dust/Debris in charging case:
One of the most common reasons for this issue due to dust/debris blocking the inner parts of the case, preventing your earbuds from making a connection. The simple fix here is to use a cotton swab to clean the case’s charging ports. You could even use a manual Air Blower to help remove built-up dust/debris.
3. Incorrectly placed Earbud tips:
Another common reason for this is incorrectly placing the earbud tips on your earbuds. This typically prevents the earbud’s connectors from resting properly on the case’s connector, thus preventing them from establishing a connection.
Simply ensure that both earbuds’ ear tips are correctly placed before placing your earbuds back in the case.
4. One earbud is completely out of charge:
This may seem like an obvious one. However, it happens a lot more than you’d think. If one of your earbuds are completely out of battery, you’d want to check its current charging status and see whether one of the reasons mentioned above is stopping it from gaining charge.
Re-Pair Device:
Once you get the earbud charging again, wait till it’s adequately charged, you’ll want to place them both back in pairing mode and try reconnecting them to your device once again. If this didn’t solve your issue move on to the next step.
2. Disconnect, “Forget,” and Reset your Earbuds
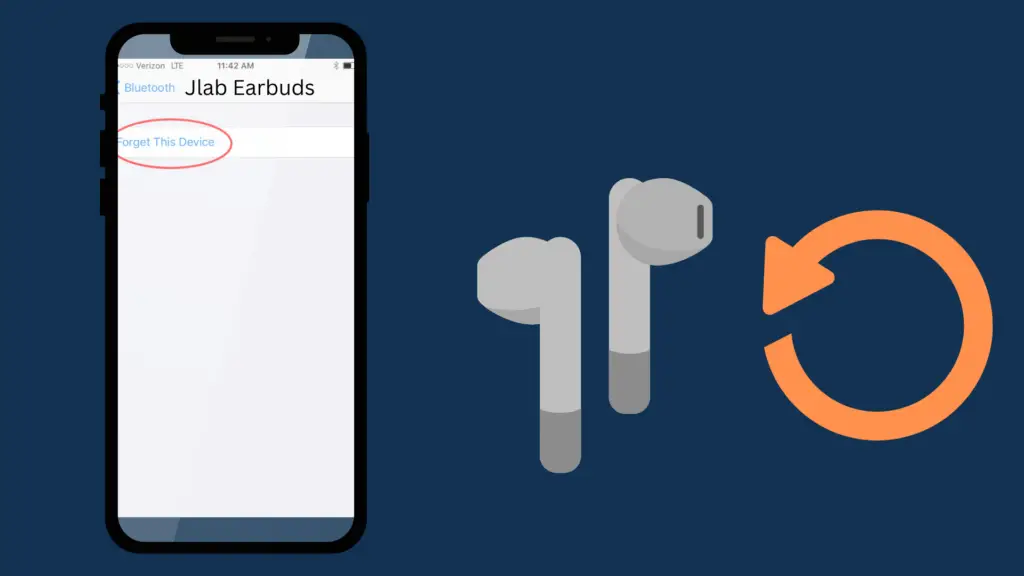
If you’ve determined that both earbuds have sufficient battery levels and both are correctly placed in the case’s charging ports, then the next step is to first disconnect your earbuds from your device and then “forget” your earbuds from all, and previously device’s including the one you are trying to connect to.
To do this, you’ll want to navigate to your device’s Bluetooth settings, now select the device your earbuds on your device’s Bluetooth list, and select “forget” device. You’ll want to ensure that this is done to all your previously connected devices as well to ensure that the reset process goes smoothly.
Next, you’ll want to reset your earbuds. The reset process varies depending on the brand and model you own. Below are guides on how to reset every single model of a few popular earbud brands. If you don’t own any earbuds from the brands listed below, refer to your device’s manual, which should also be available online.
- How to reset JBL earbuds
- How to reset Jlab earbuds
- How to reset Skullcandy earbuds
- How to Reset Soundcore Earbuds
- How to Reset Jabra Earbuds
- How to Reset Beats Earbuds
- How to Reset Airpods
Re-Pair Device:
Now place your earbuds in pairing mode and connect them to your device. Again the pairing process does carry depending on the brand and model of earbuds you own. If you’re unsure how to place your earbuds in pairing mode, take a look at one of the guides below.
- How to pair JBL earbuds
- How to pair Jlab earbuds
- How to pair Skullcandy earbuds
- How to pair Soundcore Earbuds
- How to pair Jabra Earbuds
- How to pair Beats Earbuds
- How to pair Airpods
If the earbuds you own don’t appear on the list, refer to your manual. In most cases, the manual should also be available online.
What causes this?
Wireless earbuds typically require you to place your earbuds in pairing mode for the initial pairing process, and once the initial process is complete, your earbuds then saves your device’s pairing history allowing you to connect to your device automatically.
There are multiple things that can go wrong here. The first is if you use your earbuds with multiple devices, at times, your earbuds may try to establish a connection with a previously connected device (Even if they are disconnected), thus resulting in a failed or corrupted connection.
Additionally, if there was a circumstance in which one of your earbuds ran out of battery or was at a low battery percentage, an automatic pairing could have been made with only one earbud. This can cause an issue with your device’s paired history settings. You may notice that after charging the second earbud, both earbuds will still not pair with one another.
The fix will require you to delete all saved pairing information from both your device and or previously connected devices, as well as from the earbuds themselves. This is don’t by disconnecting and “Forgetting” your earbuds from your device’s Bluetooth list as well as resetting your earbuds, which will delete all pairing information from the earbuds themselves.
3. Update Your Earbud’s Firmware
Firmware updates are typically created to fix issues, update the software of a device and sometimes add in new features. In some cases, not updating your device’s firmware can cause issues with the device’s operating software resulting in pairing and connecting issues.
Firmware updates are most common in higher-end earbuds, so not all earbuds will have the ability to update their firmware.
This is typically done via a PC or a mobile app. The process varies depending on the make of the earbuds. Be sure to check the manufacturer’s website for any available firmware updates.
4. Drain your Earbud Batteries
If the cause of the issue is a connection/pairing issue. Draining your earbuds batteries could be a viable solution. This is because draining your earbud’s batteries may help clear data that may have been interfering with the pairing process.
To do this, simply leave your earbuds out until they fully drain, re-charge them, then place your earbuds back into pairing mode and connect them to your device.
If The Problem Is Due to your Source Device:
1. Restart the Device that You’re Connecting to
The more you use a device, the more logs, and temporary caches are being created in the background, which has a negative impact on your system’s resources. These are mostly stored in your device’s RAM. This results in a memory leak which causes your device to slow down and can build up over time.
Restarting your device will completely clear up your device’s RAM, which is why in most cases, a simple restart is enough to solve serious issues.
All you would need to do here is turn your device off and back on again. You’ll also want to make sure that your earbuds are disconnected and deleted from your device’s Bluetooth history before this is done. Once your device has been restarted, place your earbuds in pairing mode and simply reconnect them to your device.
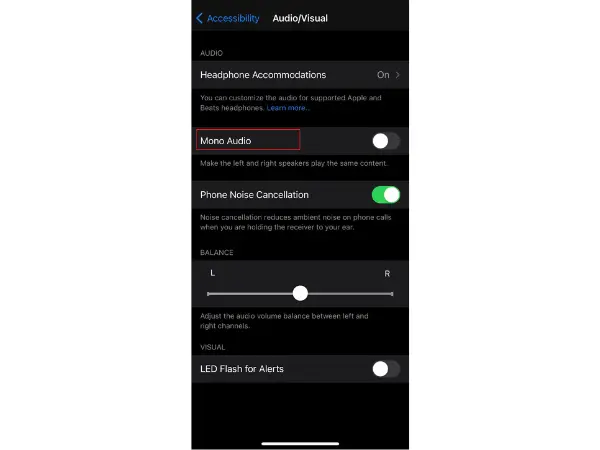
2. Ensure Mono Audio is Turned Off
For iPhone:
- Go to Settings
- Scroll down and select Accessibility
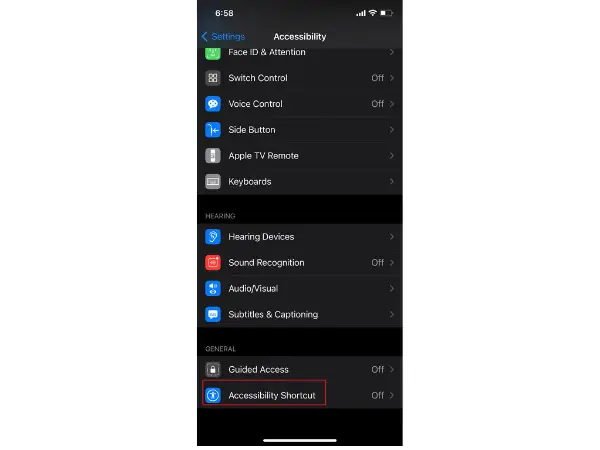
- Now Scroll down and select Audio/Visual
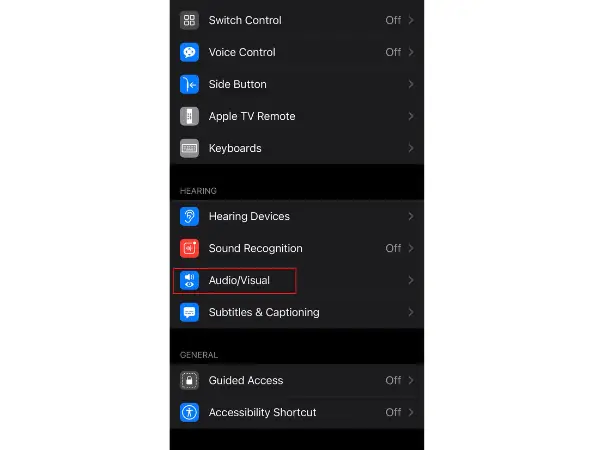
- If Mono Audio is toggled on, turn it off.
For Android:
- Go to Settings
- Scroll Down and select Accessibility
- Scroll down, Locate Mono audio and ensure that it’s toggled off.
For Windows:
- Select the Windows Start Button
- Select Settings
- Select Accessibility
- Click on Audio
- Ensure Mono Audio is toggled off.
For Mac:
- Click on The Apple Logo, located on the top left corner
- Select System Preferences
- Select Accessibility
- Select Audio (Located on the left sidebar)
- Ensure Mono Audio is toggled off
3. Adjust The Audio Balance Between the Left & Right Earbuds
For iPhone:
- Go to Settings
- Scroll down and select Accessibility
- Scroll down and select Audio/Visual
- Now Scroll Down to Balance & ensure that the slider is positioned in the center.
For Android:
- Go to Settings
- Select Accessibility
- Scroll down to “Audio and On-Screen Text”
- Now ensure that the slider is positioned in the center.
For Window:
- Right-click the speaker icon on the bottom right corner
- Select Sounds
- On the Playback tab, right-click on your device and select Properties
- Navigate to the levels tab
- and select Balance
- Ensure both the right and left earbuds are at adequate audio levels.
For Mac:
- Select the apple log on the top left corner
- Select System Preferences
- Click on Sound
- Select the “Output ab
- Now ensure that the slider is positioned in the center.
4. Update The Source Device’s Firmware
If the earbuds seem to be working fine on other devices but seem to be experiencing issues with a specific device, it’s possible that your source device would need a firmware update. There could be instances in which a bug in the operating system could be causing the issue, and a firmware update may be required to solve the issue.
For iPhone:
- Go to Settings
- Select General
- Click Software Update
- If a new software update is available, your device will then prompt you to download and install the latest firmware.
For Android:
- Go to Settings
- Scroll down and select System, then System Update
- If a new software update is available, your device will then prompt you to download and install the latest firmware.
For Windows:
- Open Computer Management. This could be done by pressing Windows Key +X or by Righ clicking Windows Icon and selecting Computer Management.
- Now select Device Manager.
- Select Firmware, located on the right side.
- Right-click on System Firmware and select Update driver.
- Now select Search automatically for updated driver software.
- If there is an update available, you’ll then be prompted to update your device.
For Mac:
- Select the Apple icon on the top left corner
- Select System Preferences
- Select Software update
- You’ll then be notified if a software update is available.
Change or Reset your Device’s Headphone Accommodation Settings ( For iPhone)
- Go to Settings
- Scroll Down and select Accessibility
- Scroll down and select Audio/Visual
- Go to Headphone Accommodations
- If this is already toggled on, you will want to scroll down to “Apply With” and check whether or not both Phone & Media are toggled on. If they are toggle, uncheck both features and then re-enable them., This will simply refresh your device’s headphone audio settings.
If this feature is toggled off, enable it and scroll down to “Apply With” Now toggle on both the Phone and Media features.
If The Problem is Caused by a Hardware issue:
1. The Speakers are Clogged
Although this seems like a highly unlikely solution, there were several cases in which this was the answer to the problem, so you’d definitely want to try it out.
If your earbuds come with removable ear tips, remove the ear tip and blow directly into the speakers. Place the ear tips back on and test the sound once again.
2. Loose or Disconnected Wiring
There may be instances in which there may be loose or detached wiring from within the earbuds. This is usually a quick fix but would require a professional to assess the issue.
3. It Could Be Actual Damage
In the majority of cases, one earbud not working would typically be a connection/pairing issue, a battery issue, or an easy-to-fix hardware issue. However, in a few cases, this might be due to damage; however, it’s rarely the case. Here are a few instances in which your earbuds could result in permanent damage:
- Dropping or crushing damage
- Used in extreme humidity, heat, or cold
- Exposure to liquids
- Earbuds were cleaned and placed in the case without drying.
If you’ve tried everything on this list and still can’t seem to get your earbuds working, the next step is to check if your warranty is still active and contact the manufacturer’s customer service to see if they can help solve the issue.