How to Transfer Photos from a Computer to an iPhone (With or Without iTunes)
How to Transfer photos from a computer to an iPhone may sound simple at first, but anyone who’s tried it knows there are multiple ways to go about it, and each comes with its own pros and cons.
Whether you’re moving high-resolution travel pictures, editing large files, or backing up memories from an old PC, choosing the right method matters not just for speed but for preserving quality and avoiding frustration.
This guide is for anyone using a Windows PC or Mac and looking to move photos to any iPhone model, including iPhone 15, regardless of whether you want to use iTunes or not.
As simple as it may seem, users often run into common issues:
- Photos not showing up in the iPhone’s gallery after transfer
- File size limits or unsupported formats
- Devices are not recognizing each other due to trust prompts
- Confusion between Lightning and USB-C cables, especially for the iPhone 15
That’s why this guide doesn’t just show you how to do it—it helps you understand why some methods work better than others, depending on your situation.
Why Transferring Photos from PC to iPhone Isn’t Always Straightforward
While Apple’s ecosystem is known for its ease of use, transferring photos from a Windows PC to an iPhone isn’t as plug-and-play as most users expect. Several roadblocks can appear depending on your device compatibility, settings, and chosen transfer method.
One major reason for this complexity is file format compatibility. Apple prefers its native HEIC image format for storage efficiency, but most Windows users deal with JPG or PNG. When you transfer directly without optimizing, some images might not appear correctly in the iPhone’s camera roll.
Additionally, high-resolution photos or large image sets can pose problems during sync. iPhones sometimes downscale files during iTunes sync, or may not show them at all if the folders aren’t structured properly.
Then, security restrictions were built into iOS. Every time you connect an iPhone to a new computer, you’re asked to “Trust This Computer.” Without accepting that prompt, transfers won’t begin. Some antivirus programs on Windows may also interfere with this process.
Lastly, your cable setup can determine success or failure. iPhones prior to version 15 use Lightning cables, while iPhone 15 introduced USB-C, which has faster data speeds but can also cause confusion if the computer doesn’t support it natively.
Understanding these variables before you start helps you avoid hours of troubleshooting.
Method 1 – How to transfer photos from a computer to an iphone Using iTunes
Using iTunes is one of the official ways Apple allows users to transfer photos from a computer to an iPhone. While it’s not always the easiest method, it’s effective when done correctly and doesn’t require any third-party software.
Before you start, make sure your iTunes is up to date. Using an older version may lead to connection issues or failed sync attempts.
Steps to Transfer Photos with iTunes:
- Install or update iTunes.
- Download the latest version of iTunes from Apple’s official website. If you already have it installed, check for updates to avoid compatibility issues.
- Connect your iPhone to the Computer via USB.
- Use your original Lightning cable or USB-C if you’re on iPhone 15. Your iPhone might prompt you to “Trust This Computer.” Tap “Trust” and enter your passcode to proceed.
- Launch iTunes and Select Your Device.
- Once your iPhone is recognized, click the device icon in the top-left corner.
- Navigate to the Photos Tab
- Check the box labelled “Sync Photos.” Then, choose the folder on your computer that contains the images you want to transfer.
- Start Syncing
- Click “Apply” or “Sync” at the bottom right. iTunes will begin transferring the selected photos to your iPhone.
What to Keep in Mind:
- Photo Overwrite Risk: iTunes doesn’t add photos; it replaces previous synced albums. Always double-check your selections.
- Folder Nesting Limitations: Subfolders may not sync properly, and only specific formats like JPG, PNG, and HEIC are supported.
Pros:
- Free and officially supported by Apple
- Works without Wi-Fi or mobile data
Cons:
- Complex interface for beginners
- No two-way sync
- Risk of photo library overwrite
Method 2 – Transfer Photos Without iTunes (Best & Easiest Methods)

For users who find iTunes limiting or unintuitive, there are simpler and often more powerful alternatives. These tools are designed specifically to let you move photos from a PC to an iPhone without iTunes, offering faster transfers, better compatibility, and more flexibility.
Use MobileTrans (Recommended for Beginners)
If you want an easy, no-hassle way to transfer photos, MobileTrans is a top choice. It offers both USB and wireless transfer modes, supports all iPhone models, including iPhone 15, and works seamlessly across Windows and macOS.
Why Choose MobileTrans?
- Maintains full image resolution with zero compression
- Clean interface with simple drag-and-drop features
- No need to worry about file formats or overwritten folders
- Also supports videos and other media files.
To use it, install MobileTrans on your PC, connect your iPhone, choose the Photo Transfer module, and follow the on-screen instructions. You can preview and select specific albums or import all at once.
Use AnyTrans, EaseUS MobiMover, or iMazing
These are also reliable alternatives if you want more control or additional features like file backup, bulk import/export, or media management.
- AnyTrans: Offers deep control of your photo albums and supports both Wi-Fi and USB modes.
- EaseUS MobiMover: Known for fast transfers and a clean interface.
- iMazing: Ideal for those who need advanced options, including scheduled backups and detailed file structure management.
Each tool varies in pricing. Some offer limited free plans while others are premium, but they all allow photo transfers without iTunes and often outperform Apple’s native method.
Method 3 – Transfer Photos to iPhone Using iCloud

If you want to transfer photos from a computer to an iPhone without using a USB cable or iTunes, iCloud is a native and reliable option. With iCloud Photos enabled, your pictures automatically sync across devices connected to the same Apple ID, provided you have internet access and available iCloud storage.
Step-by-Step: Use iCloud to Move Photos from PC to iPhone
- Enable iCloud Photos on iPhone.
- Open Settings > [your name] > iCloud > Photos, and turn on iCloud Photos. This ensures that photos added to your iCloud account will appear in your iPhone’s Photos app.
- Upload Photos from Your Computer
- Go to iCloud.com, sign in with your Apple ID, and click on the Photos icon. Select the images from your computer and upload them.
- Access Them on Your iPhone.
- Once the upload is complete, you’ll find these photos in your Photos app under “Recents” or your designated albums.
Important: This method requires a stable internet connection and sufficient iCloud storage. The free plan offers only 5GB, which fills up quickly if you’re moving high-resolution images.
Method 4 – Transfer Photos via Google Photos, Dropbox, or OneDrive
Cloud storage apps like Google Photos, Dropbox, and OneDrive provide alternative ways to send photos from your PC to your iPhone. These are particularly useful for users who prefer a cross-platform ecosystem or want more storage than iCloud provides.
How to Transfer with Cloud Apps:
- Install the App on Your iPhone.
- Download Google Photos, Dropbox, or OneDrive from the App Store and log in with your credentials.
- Upload Photos from Your PC
- Visit the respective websites (e.g., photos.google.com, dropbox.com, onedrive.com) and upload the images you want to move to your iPhone.
- Access and Save Them on Your iPhone
- Open the app, and your uploaded photos will appear. You can view them directly or tap “Download” or “Save to Camera Roll” to store them locally.
This method doesn’t require cables or iTunes and gives you access to your files across multiple devices.
Method 5 – Transfer Photos Using File Explorer (Windows)
For those who want a direct and simple method without relying on the internet or third-party tools, File Explorer is a good choice. However, this method is limited by the iPhone’s access permissions and supported folder structure.
How to Transfer via File Explorer:
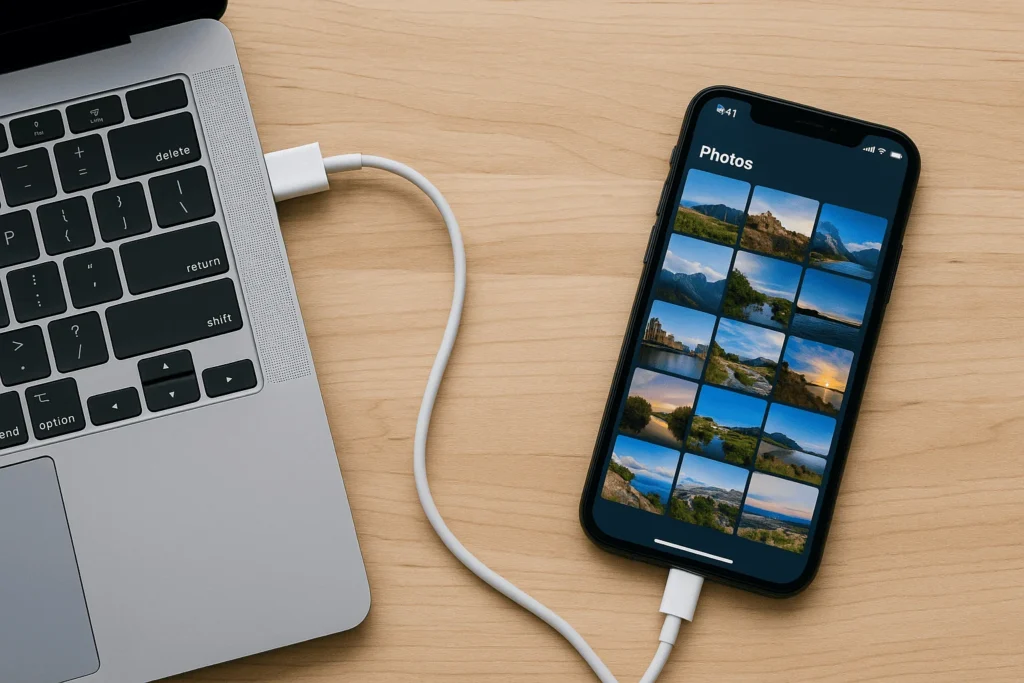
- Connect your iPhone to a PC with a USB Cable.
- Use the original Lightning or USB-C cable. Make sure the iPhone is unlocked.
- Trust This Computer
- On your iPhone, you’ll be prompted to trust the connected computer. Tap “Trust” and enter your passcode.
- Open File Explorer
- On your PC, open “This PC” and select your iPhone under Devices. Navigate to the DCIM folder.
- Drag and Drop Photos
- Drag your selected images from your computer into the DCIM folder. If the folder doesn’t allow it, your iPhone may not support incoming files from this path, depending on the iOS version or settings.
Keep in mind that not all file types are supported, and this method doesn’t allow you to create albums or manage metadata.
Method 6 – Use AirDrop (for Mac Users)

AirDrop is the fastest wireless method to transfer photos if you’re using a Mac and an iPhone. It’s completely native, doesn’t require any setup beyond turning it on, and retains the original image quality.
Steps to Transfer with AirDrop:
- Enable AirDrop on Both Devices
- On Mac: Open Finder > AirDrop
- On iPhone: Go to Control Centre> AirDrop > Set to “Everyone” or “Contacts Only”
- Select and Send Photos
- On your Mac, select the photos, right-click, and choose “Share > AirDrop.” Choose your iPhone from the available devices.
- Accept the Files on iPhone.
- A pop-up will appear on your iPhone asking if you want to accept the files. Tap “Accept,” and the photos will be saved directly to the Photos app.
AirDrop is perfect for transferring a few images quickly, especially when both devices are in close proximity and connected to Wi-Fi and Bluetooth.
Method 7 – Transfer Photos via Email or Messaging Apps
If you’re only moving a few images, email or messaging apps like WhatsApp or Telegram can get the job done without any setup.
Simple Steps:
- Send the Photos to Yourself
- Email the photos or send them via a messaging app where you can access the files later.
- Open the Message or Email on Your iPhone
- Please tap on the photo, then use the share icon to save it to your device.
This method is not ideal for large batches, but it’s great for occasional or urgent transfers.
Bonus: Transfer Photos to iPhone 15 Using USB-C
With the release of the iPhone 15, Apple officially transitioned from its proprietary Lightning port to USB-C, making photo transfers not only faster but also more compatible with a wide range of modern PCs.
If you’re using a Windows computer or a newer MacBook, the USB-C port allows for faster data transfer speeds, especially when compared to older Lightning cables. This upgrade significantly reduces the time required to transfer high-resolution or bulk photo libraries from your desktop to your iPhone.
The process of transferring photos from a computer to an iPhone 15 using USB-C is essentially the same as with previous models. What changes is the cable type and speed. Use a certified USB-C to USB-C or USB-C to USB-A cable depending on your computer’s available ports.
However, despite these improvements, users must still deal with iOS permissions. You’ll be prompted to trust the device, and transferring files through File Explorer or third-party apps still requires that prompt to be accepted.
This method works well for users who want a wired photo transfer method without relying on iTunes or cloud services. It also pairs effectively with tools like MobileTrans, AnyTrans, or even direct DCIM access via Windows File Explorer.
Mac Method – Use Finder (macOS Catalina and Above)
Since macOS Catalina, Apple has phased out iTunes in favour of Finder-based syncing. If you’re a Mac user running Catalina or later, transferring photos to your iPhone works a bit differently—but it’s still a native and efficient method.
Start by connecting your iPhone to your Mac using a USB or USB-C cable, depending on your iPhone model. If prompted, allow the connection and trust the device on your iPhone.
Then, open Finder and locate your iPhone in the sidebar under the “Locations” section. Click on the device to open the sync interface. Navigate to the Photos tab, where you can check the box that allows you to sync photos from a specific folder on your Mac.
Choose the folder you want to sync, then click “Apply” at the bottom. Finder will begin transferring those images to your iPhone, where they’ll appear in the Photos app under synced albums.
This method is reliable, doesn’t compress your images, and doesn’t require any internet connection. It’s ideal for Apple users who want full control over which photo folders get synced without relying on iCloud or third-party apps.
How to Transfer High-Resolution or RAW Photos to iPhone
For photographers or content creators who work with high-res or RAW image formats, a standard photo transfer process may not always deliver the results you expect. Many default tools compress your images or don’t fully support RAW files, which leads to a loss of detail or failed transfers altogether.
To import high-resolution photos to an iPhone without quality compromise, it’s important to use a tool that explicitly supports advanced formats like RAW, TIFF, or uncompressed JPEGs.
MobileTrans and iMazing are two tools that handle RAW photo transfers effectively. MobileTrans is more beginner-friendly, while iMazing is often preferred by professionals because it preserves metadata and file structure during the import.
Another method is using AirDrop on Mac, which does not compress your files, even when sending RAW images. However, it doesn’t provide advanced sorting or file management options.
If you’re using iCloud, be aware that while it supports high-resolution uploads, your iCloud storage can fill up quickly. The free 5GB plan is not enough for RAW files, and syncing large folders could delay access due to upload and download times.
For optimal compatibility and balance between quality and accessibility, stick to formats like JPEG, PNG, or HEIF when not working with RAW.
How to Organize Transferred Photos on iPhone
After moving your photos from a PC or Mac to your iPhone, it’s easy for your photo library to get cluttered, especially if you’re transferring files in batches. Fortunately, iOS offers built-in tools to help you manage iPhone photo albums effectively.
Start by opening the Photos app, where all new images will appear under “Recents.” From here, you can move images to specific albums. Tap “Select,” choose the images you want, tap the share icon, then add them to an existing or new album.
If you have duplicate photos from previous transfers or edits, it’s a good idea to remove them. iOS now includes a “Duplicates” section under Albums, which detects and suggests cleanup options.
To mark important images, use the “Favorites” feature, which gives them a dedicated album for quick access. This is especially useful for creators or professionals who need reference files on hand.
You can also use third-party apps like Gemini Photos (for duplicate removal) or Slidebox (for fast swipe-based album sorting) to streamline the organisation process.
Organising your images not only saves space but also makes your photo library more useful and less overwhelming.
Troubleshooting Photo Transfer Issues
Even with the right method, transferring photos from a computer to an iPhone doesn’t always go smoothly. Whether you’re using iTunes, File Explorer, iCloud, or a third-party app, you may encounter some frustrating roadblocks. Here’s how to handle the most common problems.
iPhone Not Showing in File Explorer
If your iPhone doesn’t appear when connected to your PC, check that the phone is unlocked and the cable is functioning. Also, ensure that the latest iTunes version is installed, even if you’re not using it directly, because Apple drivers are necessary for recognition.
“Trust This Computer” Prompt Not Appearing
This is a common issue, particularly after iOS updates. Try restarting both devices and reconnecting the iPhone. Use a different USB port if needed. Without tapping “Trust,” your PC cannot access the phone’s contents.
File Formats Not Supported
If transferred photos don’t appear in the Photos app, it may be a format issue. iOS supports JPEG, PNG, and HEIF. RAW formats may require third-party apps or specific software like iMazing.
iCloud Photos Not Syncing Properly
Syncing delays often happen due to poor network connectivity or limited iCloud storage. Make sure iCloud Photos is enabled on your device and that you’re logged into the same Apple ID on both platforms. App Permissions Blocking Transfers.
Apps like MobileTrans or EaseUS MobiMover need permission to access your photo library. If permissions are denied, the app cannot complete the transfer. Go to Settings > Privacy > Photos and toggle the appropriate settings.
Conclusion
There’s no single best way to transfer photos from a computer to an iPhone. The method you choose should match your priorities—whether it’s speed, simplicity, storage, or image quality.
If you prefer official tools and a straightforward sync process, iTunes on Windows or Finder on macOS is reliable. Just be mindful of its limitations in handling formats and overwriting content.
If you want a faster, one-click transfer without restrictions, MobileTrans, AnyTrans, or iMazing are excellent choices. These tools handle everything from high-resolution images to RAW files while maintaining original quality.
For wireless users or those managing files across multiple devices, cloud services like iCloud, Google Photos, and Dropbox offer convenience and accessibility, though sometimes at the cost of speed or storage limits.
Choose your preferred method above and start moving your photos without limitations. Have questions? Drop them in the comments or check out our detailed tutorials on iCloud, Finder, and third-party apps for in-depth guidance.
FAQs – Transferring Photos from PC/Mac to iPhone
Can I transfer photos from a PC to an iPhone without using iTunes?
Yes, you can use alternatives like MobileTrans, AnyTrans, or even cloud storage tools such as Google Photos and Dropbox.
What are the best alternatives to iTunes for transferring photos?
MobileTrans and iMazing are popular for fast, lossless transfers. EaseUS MobiMover is also widely used to manage photo albums without iTunes.
How do I sync photos from my Windows PC to my iPhone?
You can use iTunes for manual sync or upload your photos to iCloud.com and access them through iCloud Photos on your iPhone.
Is it possible to use Finder on a Mac?
Yes, Finder replaces iTunes on MacOS Catalina later. You can sync selected folders from your Mac to your iPhone through the Finder interface.
How do I transfer RAW photos to my iPhone?
Use MobileTrans or iMazing to retain quality. Avoid iTunes or basic drag-and-drop for RAW, as they might not handle metadata or file integrity well.
Is there a way to retain original quality when transferring?
AirDrop, MobileTrans, and iMazing all retain original resolution. Email and messaging apps often compress images.
What should I do if my iPhone is not detected by my PC?
Check the cable, update iTunes (for Apple drivers), unlock your iPhone, and respond to the “Trust This. Computer” prompt.