

One thing that you can always depend on with Apple products is that most, if not all things, are going to be proprietary and not compatible with anything other than Apple.
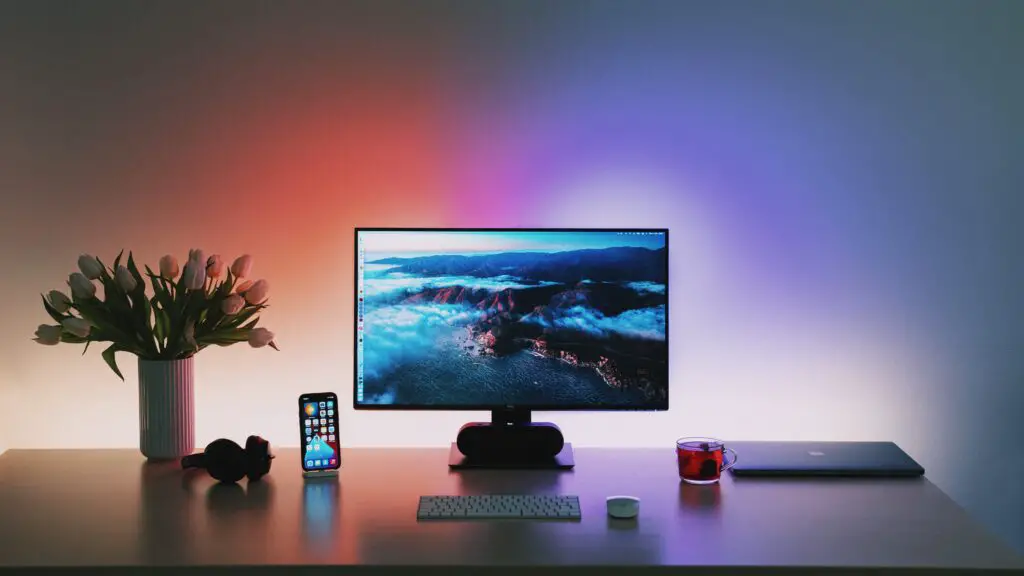
Although almost any monitor will display your Mac on screen, not all monitors are best suited for macs. Some will result in scaling issues or blurry visuals. This is due to the fact that Macs rely on around 220 Pixel Per Inch (PPI) for Retina displays and 110 PPI for non Retina displays. Because of this, the monitor needs to be of a specific size and resolution in order to output the best visuals. In terms of affordability, we find this to be a 4K resolution monitor that is 27 Inches wide, used at 2560×1440.
Let’s take a look at this in greater detail; we’ll also dive into other factors to consider when purchasing a monitor for your MacBook. Let’s dive in!
Are all Monitors Compatible with Mac?
While almost any monitor will work with Macs, not all monitors are a good fit for Macs; this is because Apple interface design uses a pixel density of around 110 PPI (Pixel Per Inch) for non Retina displays & 220 PPI for Retina displays. Anything outside this scale will result in poor image quality, such as elements that are not correctly scaled or blurry visuals.
However, Apple adjusts its display’s default scaled resolution in order to provide the best optical for your setup. For example, a MacBook pro 13 inch which has a native resolution of 2560 x 1600 at 221 PPI, will have a default scaled resolution of 1440×900, which is around 128 PPI. This is known as HiDpi mode. In order to find PPI values for, you will need to device the device’s native resolution by 2.
Because of this, rather than finding a monitor that matches your MacBook’s PPI, the ideal solution would be to find a display that offers a good scaled resolution, and this looks to be around 110 PPI.
Ideally, you would achieve 110 PPI on a non-scaled, pixel doubled resolution, known as HiDPi. Simply put, HiDP maintains a certain resolution but draws everything scaled twice.
This will allow for sharper text resolution since your device will use four times the amount of pixels resulting in crisper shapes.
So if you were to follow the above recommendation, the ideal monitor would be a 27 inch 5K resolution screen or a 20 inch 4K resolution screen. However, as you may already know, both options aren’t widely available since they aren’t suitable for mainstream use & as a result, are extremely pricey.
So what are your options?
The next best option in terms of offering the best sharpness & price point is a 4K display that is 27-inches; as mentioned above, by default, the macOS system uses 2x scaling, so at 4k will result in 1920×1080, which is 81.5 PPI. Additionally, you can use in scaled mode as 2304×1296 scaled mode, which is 98 PPI, or 2560×1440, which is 109 PPI.
Other Things To Consider When Purchasing an External Monitor For Your Macbook/ Macbook Pro
Ports and Cables
Another thing you will want to keep in mind when purchasing a monitor for your Macbook is the ports. A thunderbolt display will always be the best choice since Thunderbolt cables offer a high-speed, 4K-ready display signal and support multiple peripherals. Additionally, the Thunderbolt 3 is also bidirectional, meaning it can be used to connect your MacBook to your display as well as charge your laptop at the same time. However, displays with Thunderbolt ports are quite pricey.
So If you’re working with a budget, then you can opt for a monitor that’s equipped with USB-C ports or HDMI ports. Note that you may need an HDMI to USB-C or USB adapter(depending on your mac) when using a MacBook that isn’t equipped with an HDMI port.
So it definitely depends on your budget, but if you are aiming for the best setup possible, then a display with a thunderbolt port is definitely the way to go.
Refresh Rate
A higher refresh rate isn’t a feature most individuals who use their monitors for productivity think about, since it’s mainly considered to be beneficial for gaming and comes with a higher price tag. However, a higher refresh rate will offer more frames per second, allowing for smoother motion on your display.
Additionally, 14-inch and 16-inch MacBook Pro models with Apple silicon have a refresh rate of up to 120 Hz, so if you would like your external monitor to match your MacBooks faster and smoother motion, you will need to consider the refresh rate of your monitor.
What You Will Need to Connect a Monitor to a Macbook/Macbook Pro
All you will need to connect your monitor to your MacBook is a video cable such as a HDMI cable or a thunderbolt cable depending on your monitor, as well as an adapter if your MacBook doesn’t have the required port.
You can check whether or not you need an adapter for your laptop here. If you don’t have the appropriate port for the connector type you want to connect to your external monitor, then you will need an adapter.
So if you would like to use a Thunderbolt display with your MacBook that doesn’t come with a thunderbolt port, then you will need an adapter. You can check here if a thunderbolt adapter works with your Macbook.
If you decide to connect your monitor to your Macbook via an HDMI cable instead of a thunderbolt cable, then you will need a USB-C to HDMI adapter or USB to HDMI adapter, depending on the version of MacBook you own.
Apple offers a USB-C Digital AV Multiport adapter, a USB-C adapter that offers HDMI, USB-C, & USB ports. You can learn about the different types of adapters you can use for your macbook here.
Once you plug the HDMI cable into the other monitor and it is turned on, you should immediately get a video signal on the other monitor.
You can adjust the resolution of your monitor by:
- Clicking the Apple logo on the top right corner
- Select System Preferences -> Displays -> Scaled
You will be able to arrange your monitor settings:
- Open System Preferences on your Mac
- Select the Arrangements tab
- Leave the “Mirror Displays” option unchecked, unless you just want a standard mirror image of your own screen
- Drag your display choices into your preferred arrangement
- Drag the white menu bar (at the top of the screen) to the monitor that will be the primary monitor
You can also connect wireless displays to your Mac. However, the display in question has to support Airplay, so it’s just another tool at your disposal that is typically used to mirror a TV to watch movies or play games.
Both devices will need to be connected to the same WiFi, and you will definitely want a strong WiFi signal, especially if you are using graphics or video intensive software and lag is an issue.
How Many Monitors Can You Connect to a Mac?
That generally depends on the Mac you own. The latest Macbook Pro can connect up to four monitors at the same time through Thunderbolt ports. Of course, the kinds of monitors make more of a difference when you are connecting so many.
That isn’t in terms of manufacturers but in terms of display resolution. If all four monitors were displaying in 4K resolution, it wouldn’t work as the newest Macbook can only connect to two additional 4K monitors at the same time.
If you want to reach the maximum number of four monitors, your monitor choices have to be of a lower resolution than 4K. Keep in mind that that’s the most recent Macbook release, and older models may not support that many monitors, 4K resolution or not.
You can get a good idea of what your Mac will and won’t be able to do by checking out the specs online. You can visit support.apple, choose your model, and check your specs over before purchasing an additional monitor.
Mac Won’t Connect to Monitor
There are several reasons that you may run into this problem, and compatibility is generally not going to be the issue.
- Use a different Thunderbolt hub
- SwitchResX
- Disable Sleep Mode
- Update Your Mac
If you own a thunderbolt hub and the connection isn’t working, try pulling everything off of the hub and unplugging, plugging it back in. Reconnect just the Mac and the external display. If it still doesn’t work, try going with just a Thunderbolt to HDMI adapter cord instead.
SwitchResX is shareware, and it will often make your Mac recognize attached devices which, in this case, would be an external monitor. It also allows you to dig a little deeper into your display properties as well.
For whatever reason, having sleep mode turned on in your Mac settings will sometimes affect the attached monitor. Be sure to go in and turn it off.
Updates—or the lack thereof—is often problematic, whether you’re trying to connect an external display or download an app. Always keep your Mac updated, and if you have trouble remembering, you can always set it to do so automatically in settings.
Sometimes, the update itself will cause the issue, and you will either have to wait for the new update or roll back your Mac update to the previous version and wait on the next one.
In fact, some recent updates with the Big Sur OS in Macs have generated frequent complaints about losing compatibility with external monitors. So it’s something to look out for when you jump on that next update.


