Connecting an Xbox controller to a PC can significantly enhance the gaming experience, providing a familiar and comfortable input method for a wide range of games. With the increasing popularity of PC gaming, and Windows being an integral part of the Xbox ecosystem, Microsoft has made the process of linking Xbox controllers to PCs fairly straightforward.
There are several ways to connect an Xbox controller to a PC, including USB cables, Bluetooth, and wireless adapters. Each method offers the user a seamless way to enjoy their favorite games without the need for a dedicated gaming console. As technology continues to advance, the compatibility between Xbox controllers and PCs becomes more user-friendly, making it easier than ever before to get started.
This article will dive deeper into each method, guiding users through the necessary steps and providing helpful tips to ensure a smooth connection between the Xbox controller and the PC. By the end of this guide, users will have a solid understanding of the various techniques available and be well-equipped to choose the best option for their individual needs.
Setting Up Your Xbox Controller on PC
Windows 10 or Later
Before connecting an Xbox controller, make sure your computer is running on Windows 10 or a newer version. Xbox controllers are not officially supported on older Windows versions. To check your Windows version, go to Settings > System > About, and look under the “Windows specifications” section.
Windows 10: This version officially supports Xbox controllers
Windows 11: This upcoming version is expected to offer improved support and performance for Xbox controllers
Xbox Accessories App (optional)
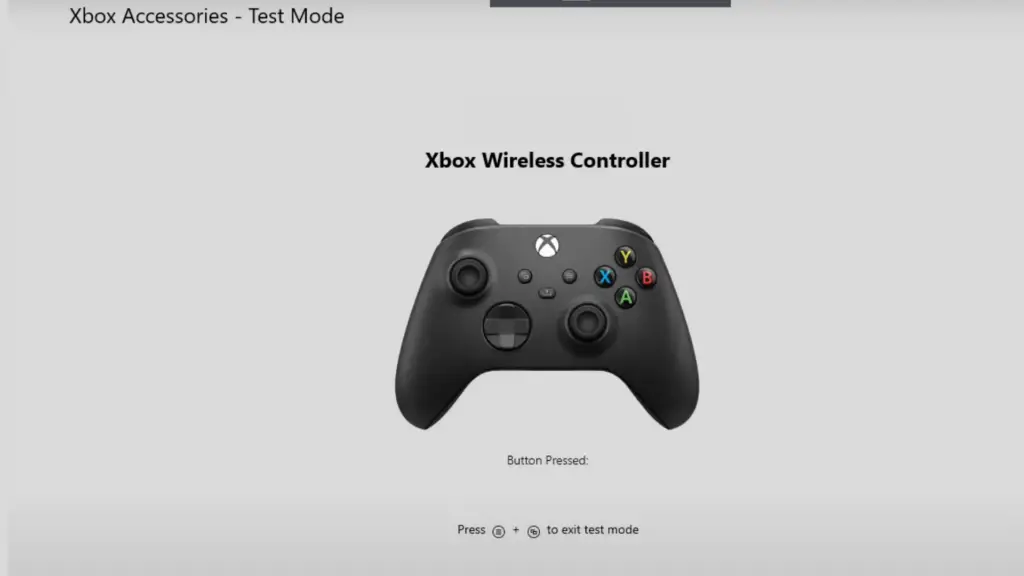
To make the most out of your Xbox controller on PC, it is recommended to install the Xbox Accessories app, which is available on the Microsoft Store. This app allows you to update your controller’s firmware, customize button mappings, and tweak various settings for an optimal gaming experience.
- Open the Microsoft Store on your PC
- Search for “Xbox Accessories”
- Click on the app and install it
Once the app is installed, launch it and connect your Xbox controller to customize its settings as desired. Remember to keep your controller updated to ensure compatibility with the latest games and features.
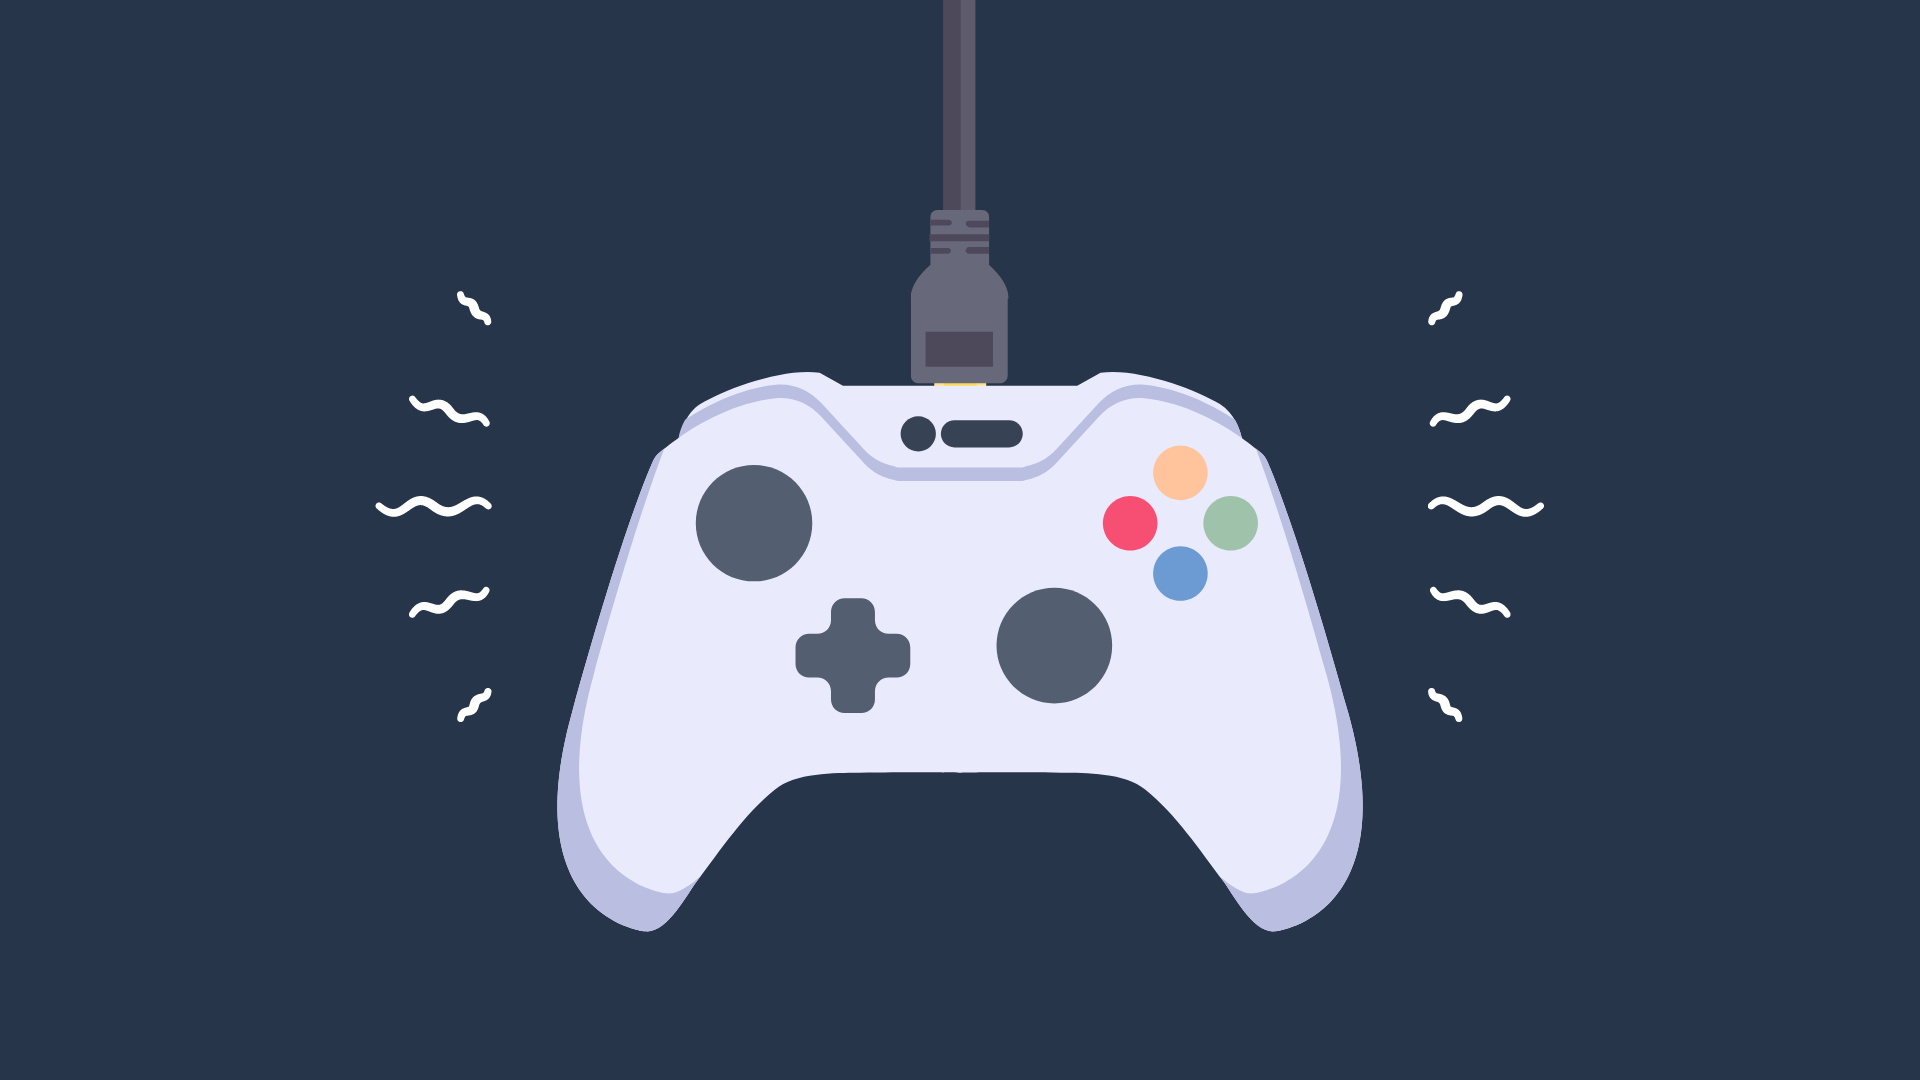
Connecting Wired Xbox Controller
Plug in USB Cable
To connect a wired Xbox controller to your PC, it’s essential to ensure you have a USB cable capable of data transfer. It’s not enough for the cable to just provide power; it must be able to transmit data as well.
Next, locate the mini-USB port on your controller. You’ll need to plug one end of the USB cable into this port. Next, connect the other end of the cable to a suitable USB port on your computer. Make sure your PC is already powered on before plugging in the controller.
Once the USB connection has been established, Windows should automatically detect the Xbox controller and install the necessary drivers. If you’re using Windows 10 or Windows 11, this process should happen seamlessly. The Xbox logo on your controller will light up once the drivers are installed and the controller is recognized by your PC.
If you’re experiencing difficulties with the automatic driver installation, try the following troubleshooting steps:
- Check your USB cable: Ensure that the cable is securely connected and not damaged.
- Try a different USB port: If the current USB port does not recognize the controller, attempt using another USB port on your computer.
- Update your operating system: Make sure you’re using the latest version of Windows to guarantee compatibility with the Xbox controller.
By following these simple steps, you should be able to connect a wired Xbox controller to your PC with ease.
Connecting via Bluetooth
Compatibility Check
Before attempting to connect your Xbox controller to a PC via Bluetooth, ensure that both your controller and computer are equipped with Bluetooth functionality. All Xbox controllers from the Xbox One S (released in 2016) onward, including the Xbox Series X/S controllers, support Bluetooth. For your PC, it must be running Windows 10 or later and have a Bluetooth 4.0 or higher adapter.
Step-by-Step Pairing
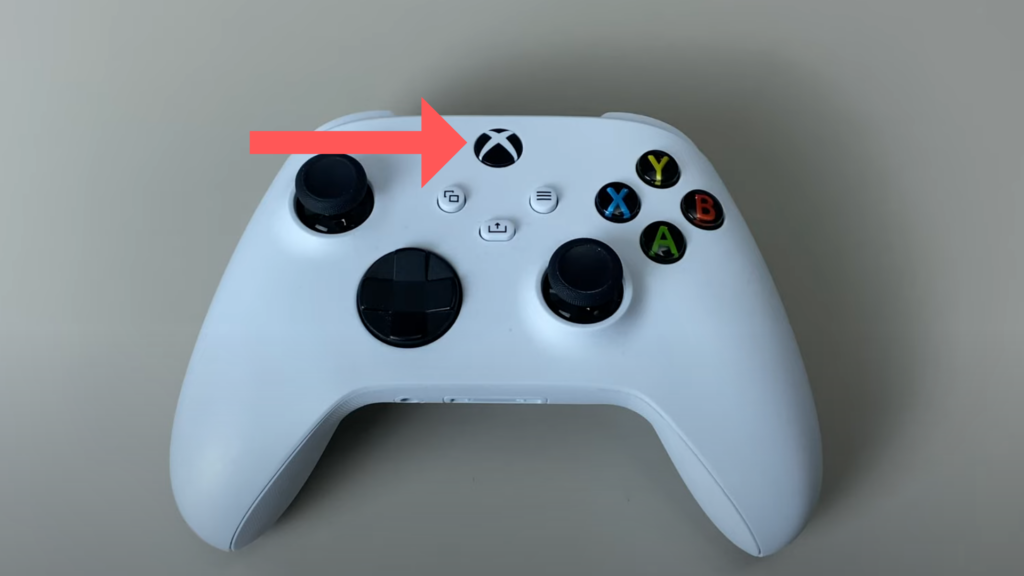
- Turn on your Xbox controller by pressing the Xbox button.
- Press the pairing button located at the top of your Xbox controller near the USB port. The flashing button signifies that the controller is in pairing mode, actively seeking a device to connect with.

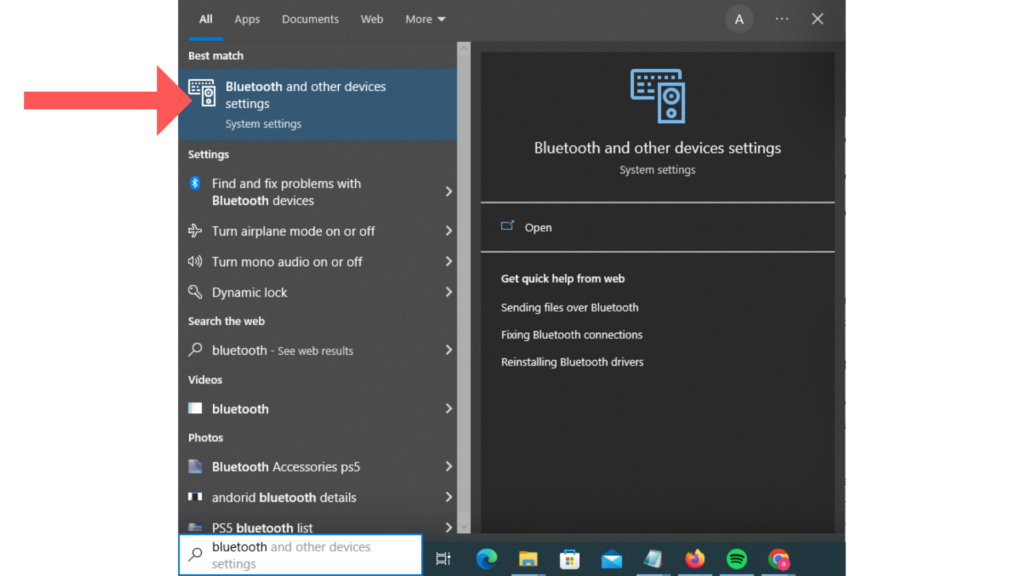
- Enable Bluetooth on your PC by clicking the Start button, typing “Bluetooth” in the search bar, and selecting “Bluetooth and other devices settings.” Ensure the switch labeled “Bluetooth” is toggled on.
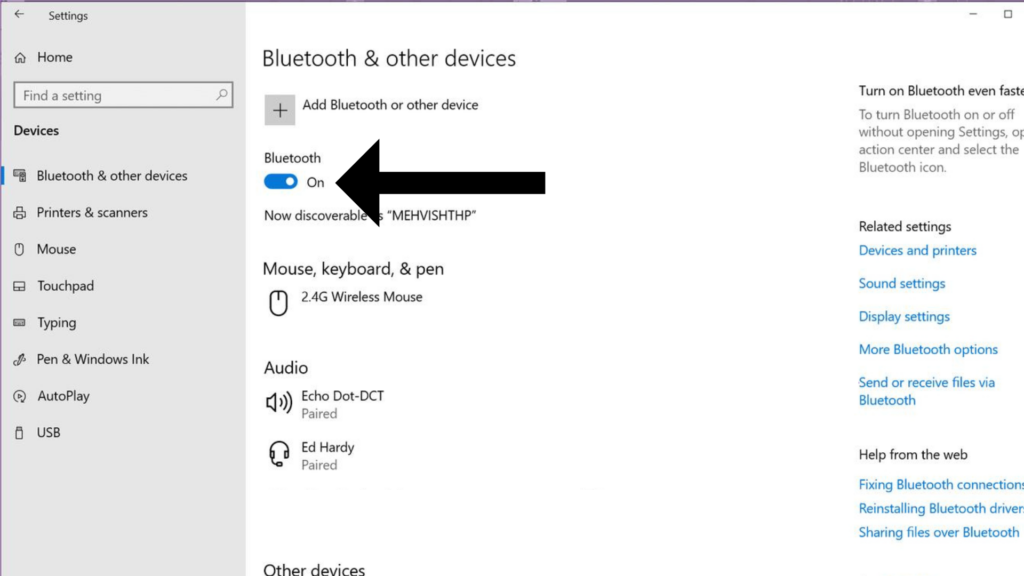
- Add a new Bluetooth device to your PC by selecting “Add Bluetooth or other device” within the “Bluetooth and other devices” settings. Click on “Bluetooth” from the options that appear.
- Pair your Xbox controller with your PC by selecting the appropriate controller from the list of available devices. Your controller might appear as “Xbox Wireless Controller”, “Xbox One Wireless Controller”, or other similar names based on the controller model. Click on your controller’s name, and the PC will start pairing with it. When the pairing is successful, the Xbox button will stop flashing and stay lit.
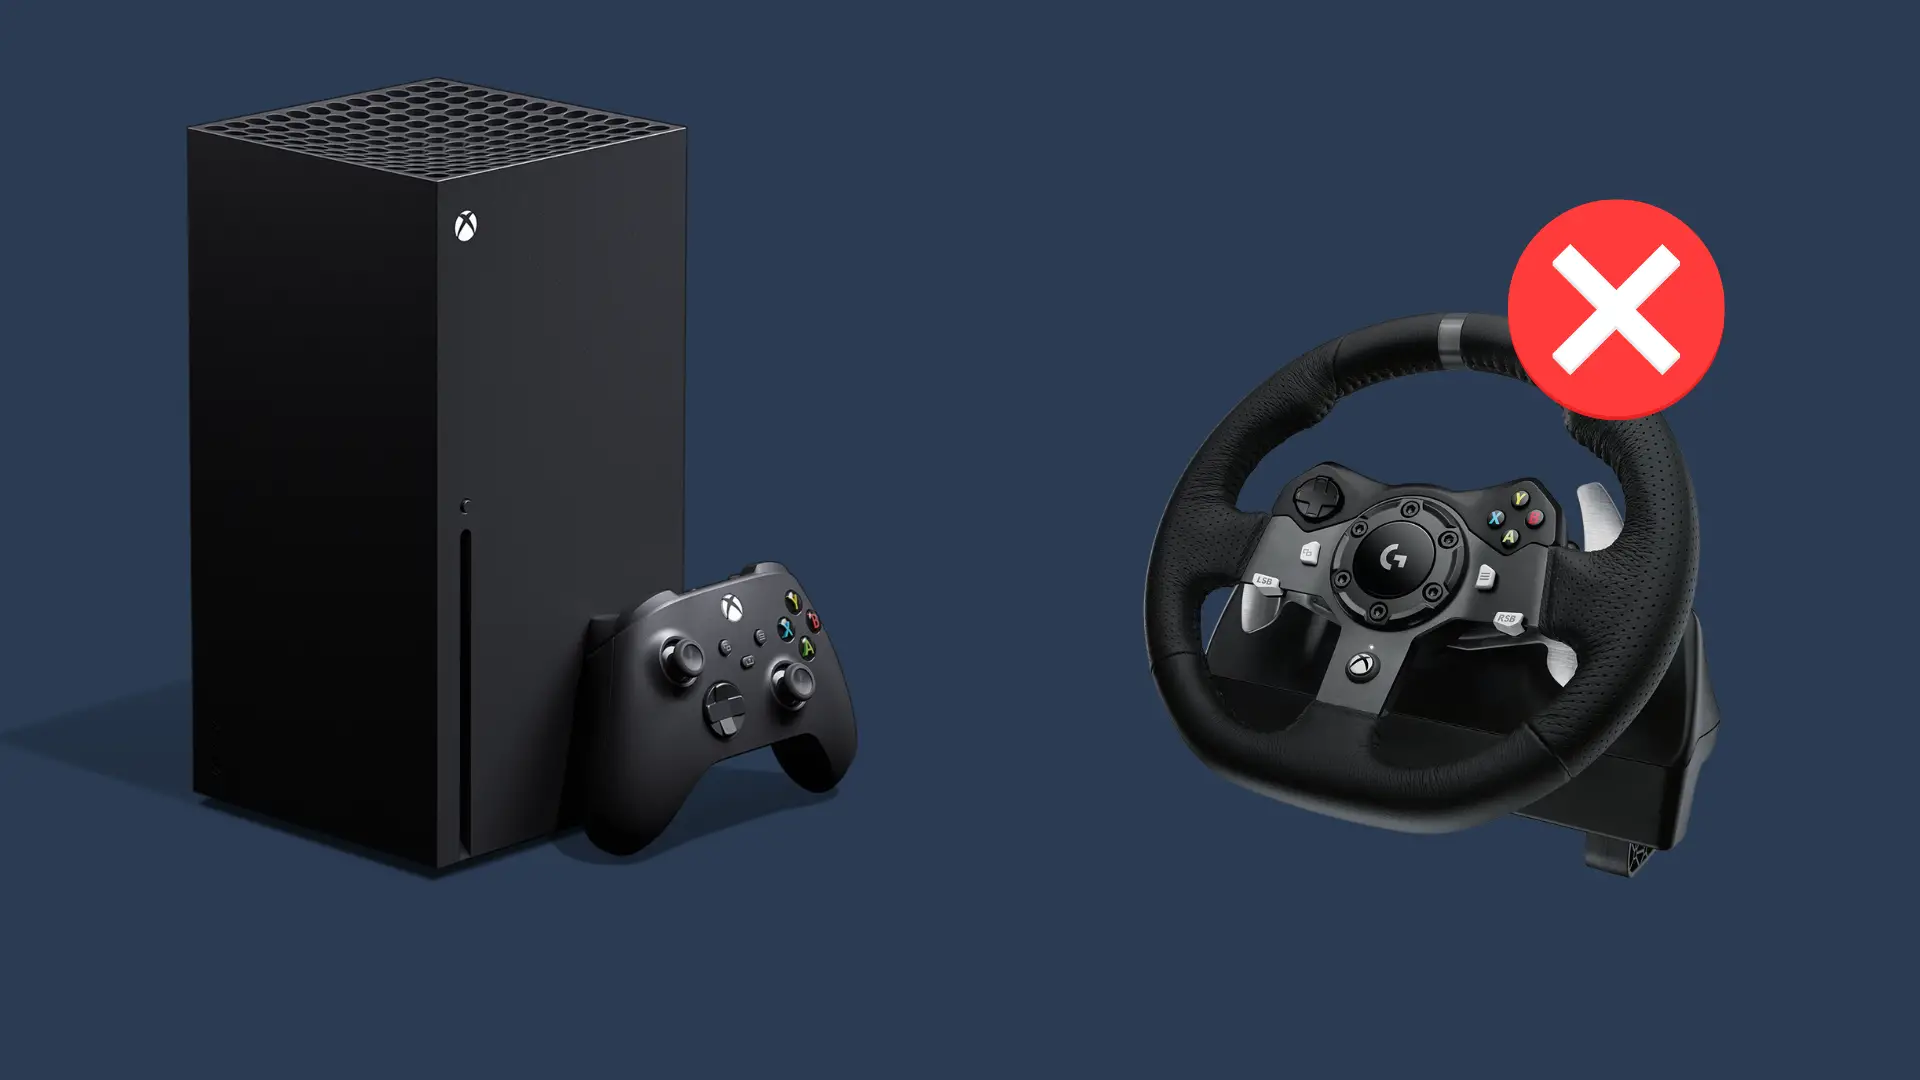
Connecting via Xbox Wireless Adapter
If your PC isn’t equipped with Bluetooth functionality, then an alternative option would be to use a Bluetooth adapter.
To connect using a wireless adapter, first, make sure your Windows device is up to date and connected to the internet. You can then plug the adapter into a USB 2.0 or 3.0 port on your Windows device, and the required drivers will be installed automatically. This is because the drivers for the adapter are built into the Windows operating system.
Step-by-Step Connection
- Connect the adapter: Plug the Xbox Wireless Adapter into an available USB port on your PC. Give your PC a few moments to recognize the new device.
- Prepare the controller: Turn on your Xbox controller by pressing and holding the Xbox button located at the center of the controller until it powers on.
- Pair the controller: On the Xbox Wireless Adapter, press the pairing button. This button is usually located on its side or top. Then, press and hold the pairing button on your Xbox controller, which is located on the top, next to the USB-C port. Both devices will flash their LED lights while searching for each other, and the connection will be established when the LEDs become solid.
- Test the connection: You can test that the controller is working correctly on your PC by opening the
Settings > Devices > Bluetooth & other devicesin Windows, and checking the list of connected devices. The Xbox controller should be listed as a connected device.
Remember to keep the Xbox controller within a reasonable range (about 30 feet) of the adapter for optimal connection and performance. This process should provide a reliable, low-latency connection between the controller and your PC, allowing for seamless and enjoyable gaming experiences.
Configuring Your Controller
To fully experience the connectivity between your Xbox controller and your PC, you might want to configure the controller’s settings according to the game or program you’re using. In this section, we will discuss different programs and methods to configure your controller.
Xbox Accessories App Settings
The Xbox Accessories app on Windows allows you to configure your controller’s settings, including button mapping, trigger sensitivity, and joystick sensitivity. To do this:
- Press the Start button, type “Xbox Accessories,” and choose it from the list.
- Sign in to the app using your Microsoft account.
- Locate your controller in the app interface and select Configure to begin adjusting the settings.
Steam Settings
Steam has its own configuration settings for a connected Xbox controller, which may differ from those in the Xbox Accessories app. To access these settings:
- Launch Steam and navigate to the top-left corner of the screen.
- Click on Steam and then Settings in the drop-down menu.
- Select Controller on the left-side panel.
- Click on General Controller Settings to configure your Xbox controller according to your preferences.
Other PC Games and Programs
Some PC games and programs might have their own controller configuration settings, usually located within the game or program’s settings menu. To configure your controller in these games, refer to their specific documentation or follow these general steps:
- Launch the game or program.
- Navigate to the program’s Settings or Options menu.
- Look for a section related to controls, input, or controller configuration.
- Adjust the controller settings as needed for that particular game or program.
Keep in mind that some games and programs might not support controller input, or may have limited support. In such cases, you may need to use third-party software for controller-specific configurations.
Troubleshooting Common Issues
When connecting an Xbox controller to a PC, users may sometimes encounter problems. In this section, we’ll address three common issues: Controller Not Recognized, Controller Disconnects Frequently, and Input Lag.
Controller Not Recognized
If the PC does not recognize the Xbox controller, first ensure that it is connected properly. For wired controllers, check the USB connection. For wireless controllers, confirm that the controller is paired with the device via Bluetooth or the Xbox Wireless Adapter.
- For wired controllers, try using a different USB port and ensure that the cable is functioning properly.
- For wireless controllers, press and hold the binding button located next to the USB port on the controller until the Xbox button flashes rapidly. This indicates it is in pairing mode.
Additionally, ensure that the PC has the latest updates for the controller:
- Connect the controller to the PC using a USB cable.
- Download the Xbox Accessories app from Microsoft Store.
- Launch the app.
- Install the latest updates for the controller.
Controller Disconnects Frequently
In the case that the Xbox controller frequently disconnects from the PC, consider the following steps:
- Check battery levels and replace them if necessary. Low battery levels can cause frequent disconnections.
- Move the controller closer to the PC or the Xbox Wireless Adapter, as interference or distance may cause disconnections.
- Disconnect and reconnect the controller from the wireless connection, or forget and repair the connection.
Input Lag
Input lag occurs when there is a noticeable delay between pressing a button on the controller and the corresponding action on the screen. To reduce input lag, try the following steps:
- Connect the controller using a USB cable instead of a wireless connection.
- Disable other Bluetooth devices connected to the PC, as they may interfere with the controller’s connection.
- Check for any software or firmware updates for the controller.
By following these steps, users should be able to resolve common issues encountered when connecting an Xbox controller to a PC.