The Oculus Quest 2, a standalone VR headset, has gained tremendous popularity among gaming enthusiasts due to its ease of use and high-quality visuals.
However, for a more immersive and enjoyable VR experience, it is essential to adjust your height in VR according to your personal needs and preferences.
In this article, we will guide you through the step-by-step process of adjusting the VR height on the Oculus Quest 2, ensuring you have the most optimal and immersive gaming experience possible.
How to Adjust Height on Oculus Quest 2?
Previously there were no direct menu items to help adjust the height of your Oculus Quest 2 setup. There were also no buttons available to set height preferences on the headset. However, thankfully, that’s all changed, thanks to update V37. Here’s how you can adjust the height on your Oculus Quest 2:
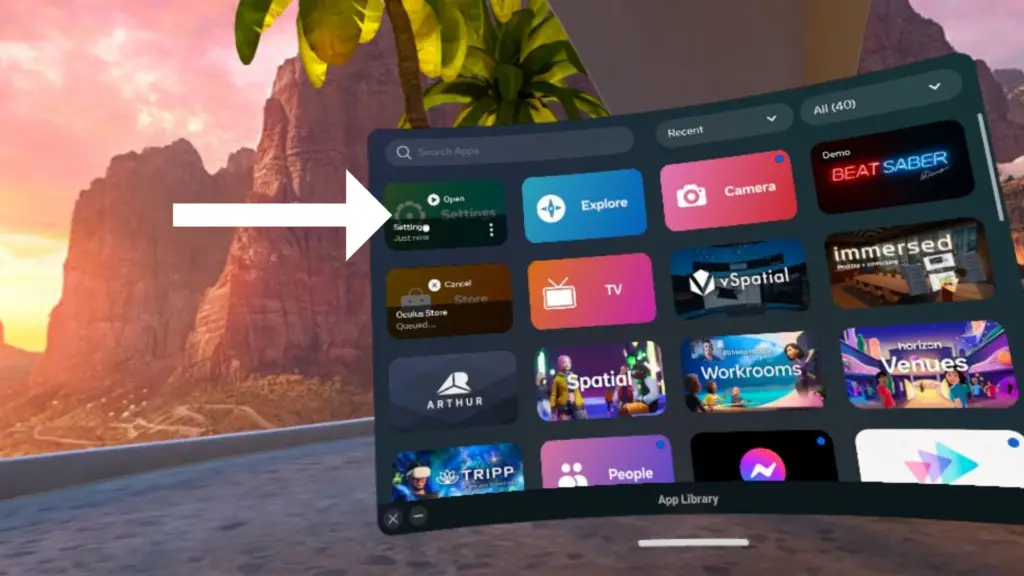
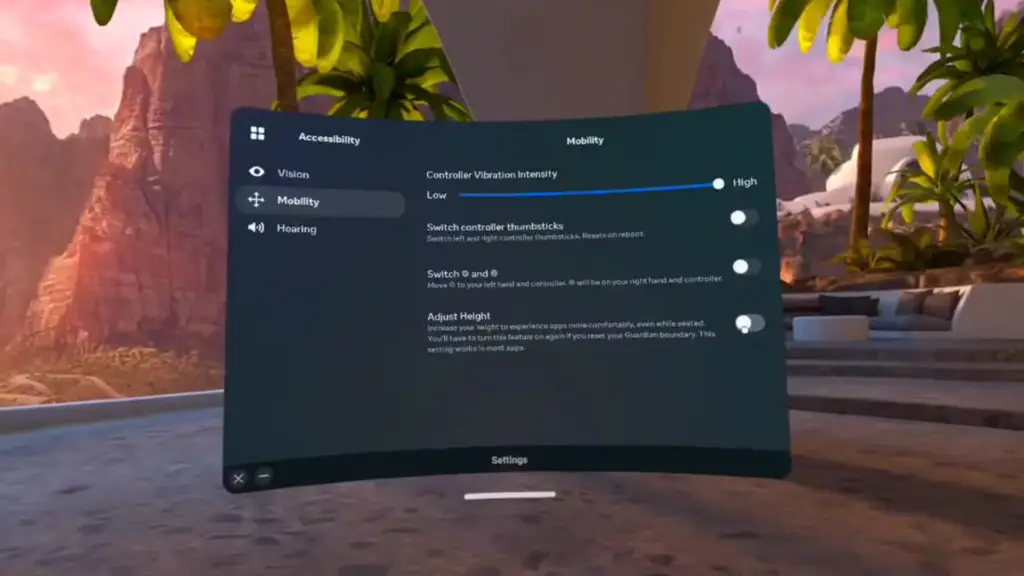
- Go to Settings.
- Select Accessibility Settings.
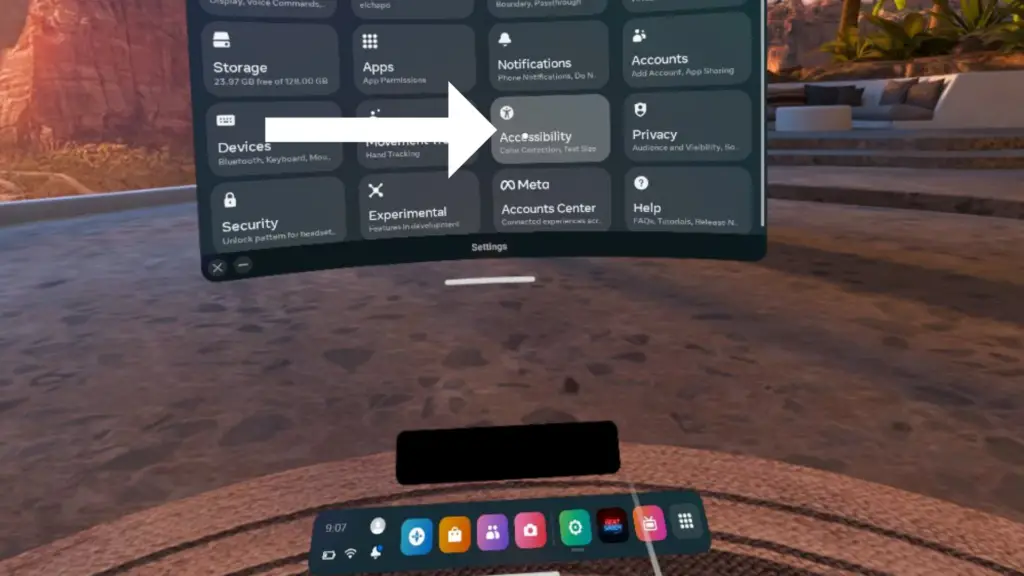
- Now toggle on Adjust Height.
And that’s it! You’re all good to go.
There are also a few other ways in which you can adjust your height on your Oculus quest. Let’s take a look.
Alternative Methods to Adjusting your Height on the Oculus Quest 2:
Disable Guardian and Tracking on the Oculus Quest 2
You can attempt to adjust the height of your Oculus Quest 2 setup by disabling the tracking and guardian included with the Oculus Quest 2 headset and controllers. After you enable the Developer Mode for your headset, complete the following steps to disable Guardian and Tracking:
- Stand in an upright position without adjusting your height or sit how you intend to play once you have entered into a VR game. Ensuring that you are sitting or standing as you typically would while playing will help you find the right settings for your Oculus Quest 2 headset.
- Power on your Oculus Quest 2 headset and allow the system to load completely before attempting to change settings or preferences.
- Navigate to the main menu and select “Settings” from the main screen once your Oculus headset has loaded.
- Navigate to the ‘Developer’ tab, which is located in the same main ‘Settings’ menu as the headset itself.
- Uncheck ‘Guardian’, which appears within the Developer tab.
- Select ‘Device’ from the same ‘Settings’ navigation menu.
- Uncheck ‘Device’ to stop ongoing tracking with your Oculus Quest 2 headset, which can interfere with any height settings or preferences you currently have set in place.
Oftentimes, simply disabling Guarding & Tracking can help significantly when it comes to feeling comfortable with the height settings and height tracking tools included with the Oculus Quest 2 headset.
How to Trick Your Oculus Quest 2 Headset to Lower Your Floor’s Height/Level
Another way you can attempt to trick your Oculus Quest 2 into better reading your height is to get the headset to believe your floor is lower than it actually is. In order to try to increase your height in VR by tricking your Oculus Quest 2 into thinking your floor is lower than it is, try the following tips:
- Set up your Oculus Quest 2 from the highest location or floor in your home. Using a higher floor when setting up your Oculus Quest 2 provides you with a lower level to place a controller on while calibrating your headset.
- Place one of the Oculus Quest 2 controllers you are using in front of the system while placing the other as low as possible to the floor or even on steps going downstairs. This will help lower the overall floor level the Oculus Quest 2 headset is picking up, making you taller in-game and while you are in VR.
How to Increase Height in VR using the Oculus Quest 2 Controller Swing Method?
Trying to change the way your Oculus Quest 2 headset reads your height is not always easy, but it can be done with enough attempts. Another way to increase your height in VR is to use the Oculus Quest 2 controller swing method with the following tips:
- Open the ‘Guardian and Floor Height’ menu from your Oculus Quest 2 main settings.
- Crouch with the Oculus Quest 2 controllers in your hand when you access the ‘Floor’ settings.
- Swing your arms back and forth, nearly touching the ground while calibrating your controls.
- Do this repeatedly as the headset will have difficulties picking up your movements if your hands are low enough. When done successfully, this should lower the playing/floor level of your Oculus Quest 2 headset, thus helping you to appear taller in-game.
How Do I Enable Developer Mode for My Oculus Quest 2?
Enabling Developer Mode on your Oculus Quest 2 headset is essential before you are permitted to disable additional features, such as Guardian and Tracking. To enable the Developer Mode for your headset, you will need to complete the following steps:
- Create a Developer account with the official Oculus website or app. Creating a Developer account is necessary before you are able to implement Developer mode and enable it on your own Oculus Quest 2 device.
- Log in to your Developer account using your Oculus account or your Facebook account.
- Create a name for your Developer organization.
- Accept the Terms and Conditions and select ‘Submit’ to finalize the creation of your Oculus Developer account.
Once your new Developer account for Oculus has been created and activated, complete the following steps to finalize the enabling of your headset’s Developer mode:
- Power on your Oculus Quest 2 headset and allow it to boot up completely.
- Launch the Oculus app you used to register your Developer account via your iOS or Android smartphone.
- Select ‘Devices’ from the bottom right-hand main menu of the Oculus application.
- Select ‘Connect’ from the screen.
- Choose the Oculus Quest 2 headset you intend to enable Developer mode on.
- Click ‘Developer Mode’.
- Verify that ‘Developer Mode’ has been checked.
- Restart and reboot your Oculus Quest 2 headset to complete the enabling of the Developer mode on your headset and device setup.
Why Should I Use Developer Mode for My Oculus Quest 2?
Creating a developer account and enabling Developer Mode on your Oculus Quest 2 headset provides access to additional games, apps, and developer tools for the Oculus system that are unavailable anywhere else. Having Developer Mode enabled also provides you with more abilities when it comes to enabling and disabling features for your Oculus Quest 2 at any time and without hassle.
How Can I Verify That My Oculus Quest 2 Has Developer Mode Enabled?
You can easily verify whether or not your Oculus Quest 2 has Developer Mode enabled by completing the following steps:
- Power up your Oculus Quest 2 headset and allow the main menu to load.
- Navigate to the main menu settings of your Oculus Quest 2 headset.
- Scroll to and click ‘Developer’ from the left-hand main navigation menu for your Oculus Quest 2 headset. This menu item will only appear once you have successfully connected and linked your Developer account to your current Oculus Quest 2 headset.