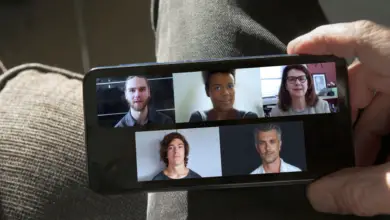
With the surge in remote learning and virtual meetings, a pertinent question often arises: “Can teachers turn on your camera during a Zoom session?”
To directly address this concern, the answer is a clear and resounding no. In Zoom, you maintain control over your camera at all times, ensuring your privacy is upheld.
This article delves deeper into the privacy policies of Zoom, the control hosts have during meetings, tips for ensuring your privacy, and how to manage camera permissions. It aims to equip you with the necessary information to safely navigate this widely-used platform.
Can Teachers Actually Turn On Your Camera?

The straightforward answer to this question is no, teachers cannot independently turn on your camera during a Zoom session. This control is beyond the scope of the features provided by Zoom, as it’s a significant invasion of privacy. Any remote software that allowed such a feature would be deeply concerning and potentially illegal.
Zoom, as a robust video conferencing tool, offers a wide range of features, including screen sharing, recording, breakout rooms, and the ability for the host to mute participants. In this suite of capabilities, hosts do have the option to request a participant to stop their video, but they do not have the power to turn it on.
It is crucial to understand that none of these features extend to remotely controlling another user’s camera without their explicit consent. This underscores Zoom’s commitment to maintaining user privacy and consent in the digital space.
When you join a Zoom meeting, you have the option to join with your video (camera) on or off. Throughout the meeting, you retain control over your camera settings. If your camera is off, only you can turn it on. If a host or another participant requests you to turn on your video, a notification will pop up on your screen. It’s up to you whether you choose to accept this request or not.
Remember, maintaining control over your camera and microphone is not only about privacy, but also about consent. Participants in a Zoom meeting should feel comfortable and secure in their digital environments. It’s the responsibility of every meeting participant, hosts and guests alike, to respect this ethos of mutual respect and consent.
However, it’s important to note that different institutions may have their own policies regarding camera usage during remote learning or meetings. Always ensure you’re aware of any such policies and discuss any concerns you might have with the relevant authority.
In the next section, we will delve deeper into privacy concerns around remote learning.
Understanding Zoom’s Privacy Policies
Zoom’s privacy policies are essential to understand for anyone regularly using the platform for communication, especially for education. These policies lay out the platform’s stance on user privacy, how user data is collected, stored, shared, and how users can control their own data. Here, we’ll attempt to simplify these policies to help users make informed decisions while using the platform.
- User Consent: Zoom’s policy clearly states that they collect and process user data with the user’s consent. This consent is often given when a user agrees to the terms and conditions of the platform while signing up.
- Data Collection and Usage: Zoom collects user data to provide and improve their services, for customer support, and for safety and security purposes.
- Data Sharing: Zoom does not sell personal data to third parties. However, they do share certain data with third-party service providers for specific purposes like providing customer support and managing their services.
- Cookies and Tracking: Like many online platforms, Zoom uses cookies and other tracking technologies to provide, maintain, and improve their services. They also use these technologies to measure the effectiveness of their ads and to personalize ad content.
- Data Security: Zoom employs various security measures to protect user data, such as encryption, access controls, and secure software development practices. However, no online platform can guarantee absolute security, and users are advised to protect their own data with strong passwords and careful sharing practices.
- User Control: Zoom provides users with the ability to control their data. Users can view, update, or delete their personal information, and they can also manage their settings, including camera and microphone settings, at any time.
What Controls Does the Host Have?

Zoom offers a range of controls to hosts, allowing them to manage the participants and the overall flow of the meeting. Here’s an outline of the key controls available to a host during a Zoom session:
- Muting Participants: The host has the ability to mute or unmute the participants’ microphones. They can choose to mute all participants at once or mute them individually. It’s important to note that hosts cannot unmute participants without their consent; participants will receive a prompt asking if they wish to unmute themselves.
- Video Control: While the host cannot turn a participant’s camera on or off, they can request a participant to start or stop their video. The participant has the option to deny this request.
- Screen Sharing: Hosts can decide who gets to share their screen during the meeting. They can allow all participants to share their screens or restrict this capability to themselves or specific participants.
- Meeting Management: Hosts have the power to start and end a meeting. They can also lock the meeting to prevent new participants from joining once the meeting has started.
- Participant Management: Hosts can remove participants from the meeting. They also have the ability to prevent removed participants from rejoining the meeting.
- Breakout Rooms: Hosts can create breakout rooms and assign participants to these rooms for small group discussions.
- Recording: Hosts can record the meeting. They can choose to record it locally on their device or in the cloud, if the feature is available to them.
- Chat Management: Hosts can control who participants can chat with — everyone publicly, everyone privately, or no one at all. They can also save the chat, either manually or automatically.
- Waiting Room: Hosts can enable the waiting room feature to control when a participant joins the meeting.
- Annotations and Whiteboard: Hosts can allow or disallow participants to annotate on shared content or use the whiteboard.
While Zoom has privacy policies in place and provides users with control over their own data, there are additional steps individuals can take to further protect their privacy during online classes. Here are some tips:
Tips for Protecting Privacy While Using Zoom for Classes
- Manage Your Settings: Ensure your video and microphone are off by default when you join a meeting. You can adjust these settings in the Zoom app’s settings.
- Backgrounds: Use a virtual background or blur your background to keep your personal space private.
- Sharing Information: Be cautious when sharing screens to ensure no sensitive information is inadvertently displayed.
- Recording Awareness: Always be aware when a session is being recorded. The Zoom app indicates this via an icon or notification.
- Personal Details: Avoid using personal photos or information in your profile or as your screen name. Stick with your first name or a nickname.
- Leave Meeting: Ensure you properly leave the meeting and don’t just close the app. This ensures your camera and microphone are disconnected.
- Update Regularly: Keep your Zoom app updated to the latest version. Updates often include important security patches and new features.
- Controlled Environment: Try to set up a controlled environment for your classes. This way, you can prevent unexpected interruptions or background noise.
- Report Issues: If you come across any security or privacy issues, report them to your teacher or the IT department of your institution. They can address the issue and possibly provide additional guidance.
Remember, privacy protection is a shared responsibility. While platforms like Zoom are responsible for providing secure and private communication channels, users are responsible for managing their personal information and utilizing available settings and features to enhance their privacy.
How to Manage Camera Permissions on Zoom
Controlling your camera permissions is a key element of maintaining privacy during Zoom sessions. Here are steps to manage your camera permissions on different devices:
On a Computer (Windows/Mac):
- Joining a Meeting: When you join a meeting, a pop-up will ask you if you want to join with video. You can select ‘Join without Video’ to enter the meeting with your camera off.
- During a Meeting: If you want to turn your video off or on during a meeting, you can do so by clicking the ‘Stop Video’ or ‘Start Video’ button in the bottom left corner of the Zoom window.
- Default Settings: You can set your preferences to always turn off the video when joining a meeting. To do this, open the Zoom app, click on ‘Settings’ (the gear icon), go to the ‘Video’ tab, and check the box that says ‘Turn off my video when joining a meeting’.
On a Mobile Device (iOS/Android):
- Joining a Meeting: When joining a meeting, you can tap ‘Join with Video’ to use your camera or ‘Join without Video’ to join with the camera off.
- During a Meeting: To turn off your video during a meeting, tap the screen to bring up the meeting controls, then tap ‘Stop Video’. You can turn it back on by tapping ‘Start Video’.
- Default Settings: To set your preferences to always turn off the video when joining a meeting, open the Zoom app, tap ‘Settings’ (the gear icon), tap ‘Meetings’, and then toggle on ‘Always turn off my video’.
Remember, even if you grant Zoom access to your camera, you retain control over it during meetings. Always be aware of your video settings to ensure you’re sharing video only when you want to.