

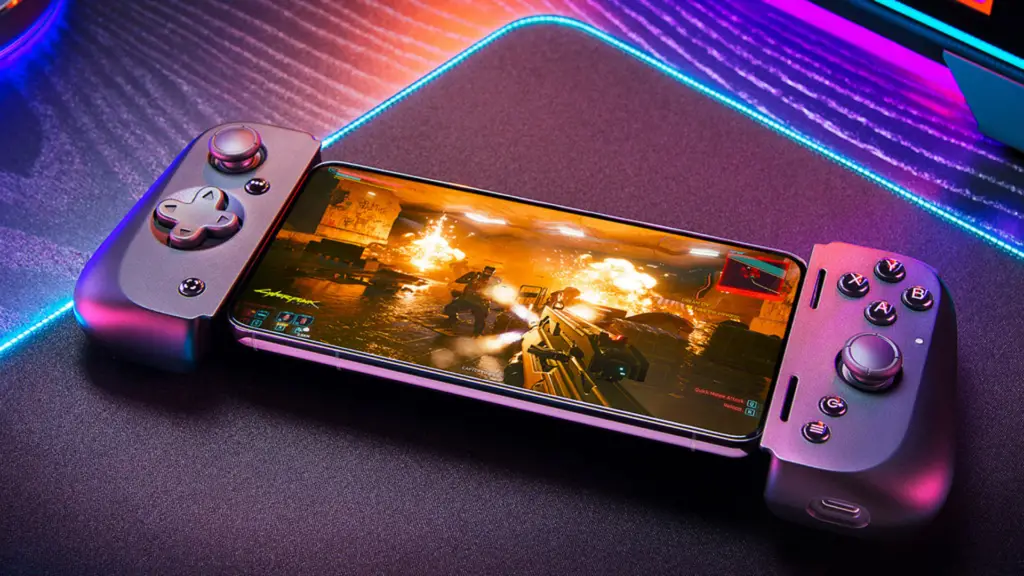
The Razer Kishi is one of the most popular gamepad attachments for the iPhone. With the Razer Kishi, mobile gamers are able to play a wide variety of games from different genres without the need to use touch controls. However, before anyone starts using the Razer Kishi, they need to connect it with their phone.
How can I connect a Razer Kishi to my iPhone?
Begin by unlatching the device from its locked position by pressing on the tabs in the back panel. Then can adjust the width of the device. Lastly, place your phone in the gamepad connecting it with the lightning port, and then push the sides in to fit the phone.
What you should know about the Razer Kishi
The Razer Kishi V1 is currently the only model that supports iPhone, but a V2 iPhone model will come out soon. The V2 is fairly similar to V1, except for some ergonomic changes and the addition of extra buttons. Connecting an iPhone to the future V2 model should work the same way as the V1 model.
A Step-by-Step Guide Explaining How to Connect a Razer Kishi to iPhone
Connecting your iPhone to your new Razer Kishi device doesn’t have to be a complicated process. Follow this step-by-step guide to fit the Razer Kishi to any supported iPhone.
Keep in mind that the Razer Kishi is only compatible with iPhone models that have a lightning port and that support iOS 9.0 or higher. iPhone models from the iPhone 5 and onwards have a lightning port, the Apple-proprietary charging port at the bottom of your phone. However, only models including and after the 6S and first generation SE support the Razer Kishi.
#1 – Open Up Your Controller:
Start by pulling the two release hatches up and down. The release hatches are located directly above and below the retaining plate in the middle of the back part of the controller. If you do this correctly, the sides of the controller will expand outwards, making it possible for you to fit your phone into the controller.
New models that come straight out of the box should automatically be in the locked position when you take the gamepad out.
#2 – Connect Your iPhone to the Lightning Port:
Once the gamepad has expanded to fit your phone, line up your iPhone with the back panel so the screen and buttons face outwards. From there, push your iPhone into the lightning port. An LED indicator light will flash red when your iPhone is entirely in.
Don’t be afraid to push your phone into the proper position, but you don’t need to push that hard. The Razer Kishi is flexible and expandable to fit XL devices. However, the left side pulls out farther and is more stretchable.
#3 – Press in the Left Side of the Gamepad:
The stretchy band in the back of the Razer Kishi should have a fair bit of tension, as long as your gamepad isn’t heavily used. Bearing this in mind, you likely won’t have to press the left side of the gamepad’s grip to fit your phone. However, you may need to refit the grip to shape the side of your phone so your phone doesn’t slip out while you are gaming.
What does the Razer Kishi app do?
While you technically do not need the Razer Kishi app to use the gamepad for the first time, it is highly recommended and is an informal fourth step on how to connect your Razer Kishi with your iPhone.
The Razer Kishi app allows you to update the firmware on your gamepad, allowing it to function better with new releases from the App Store. Firmware updates also remove any potential bugs the controller may have with older games. Razer Kishi V1 models for iPhone are still being manufactured new for online and in-person retailers, and updates likely won’t be pre-installed.
How do you detach an iPhone from the Razer Kishi?
To detach your iPhone from the Razer Kishi, begin by holding both sides of the gamepad. Then, very slowly, start to pull the left side of the gamepad. The right side of the gamepad should be fairly locked and shouldn’t be pulled from. Raise your iPhone over the left side grip. You will now be able to pull it out of the Razer Kishi’s lightning port plug.
Do not have your hands directly on your phone because you may damage your phone if you pull too hard or improperly. Your iPhone should stay in place as long as you keep the gamepad at an upright angle or so your phone’s screen is facing your ceiling.
How do you collapse a Razer Kishi?
To collapse a Razer Kishi, align the device, so it is perfectly even on both sides. You will know when this is the case when the tabs in the middle are perfectly even, and the separated retaining panels on the back can line perfectly on top of each other without overlapping.
Lastly, press both sides together. If you hear a clicking noise, then your Razer Kishi should be collapsed. An easy way to test if your Razer Kishi is collapsed is to pull lightly on the left side without using the tabs. If your Razer Kishi doesn’t expand outwards, then it is collapsed.
How can you clean your Razer Kishi?
Begin by uncollapsing your Razer Kishi from its locked position. Refer to the step-by-step guide if you are still confused about how to open your Razer Kishi.
Remove the rubber grips from the Razer Kishi if you have kept them in. It is best to clean the grips frequently because retailers do not sell the grips separately from the gamepad.
Then use a cotton swab, or ball dipped or soaked in isopropyl alcohol to clean every part of the gamepad and grips. Make sure to clean the joysticks and back triggers extra well because that is where grime can build up the most.
Once you are done and the device is fully dry, put the grips back and collapse it.


